Ever since college I've started shopping at CVS. They have GREAT prices and you can sign up for their "Extra Care Card" which offers you coupons and "Extra Bucks." The coupons are great and the more you spend the more you get rewarded with Extra Bucks. Extra Bucks is CVS cash that you can put toward your purchase lowering the price! After every purchase at CVS, you'll get your receipt with sooooo many coupons attached to it as well as how much "Extra Bucks" you've acquired. It also informs you of the great sales that will be going on next week! I highly suggest that you get all of your DIY needs for this project from CVS and get your own "Extra Care Card!"
Here's an example of what Extra Bucks look like:
Pictured above are the items I purchased from CVS and in total it came to around $10.00. The 5 piece travel kit contained perfect containers for lip balm! I didn't mind buying the travel kit because I know it will come into use later and it was only $5.99!
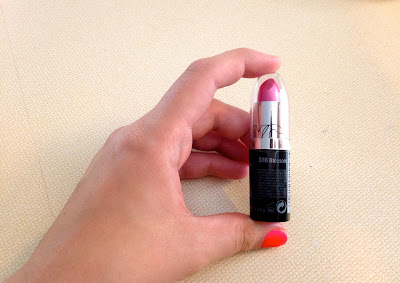
The lipstick is called "Blossom" by NYC. It was 99 cents and I fell in love with the shimmery pink color; so perfect for summer!
I decided on a small container of Vaseline and it was only $1.75!
Time to get started on the DIY!
Start by unscrewing the empty containers of your choice, that way they're ready to be filled once the lip balm is finished!
Next, start to heat up your pan. It will make the melting process quicker if the pan is already heated when you put the vaseline and lipstick into it!
Time to add the Vaseline! Start off with two teaspoons.
Vaseline can be very sticky, so use another spoon to get it into the pan!
And.. the second spoonful!
While you let that melt down, add the lipstick of your choice! Remember that darker colors will be more prominent on the lips and lighter colors will add a shimmer to the balm. I would also suggest removing the lipstick from the tube over a napkin to condense the mess.
The lipstick will start to melt down and mix with the Vaseline! (sorry for the glare!)
To finish your lip balm mix, add one more teaspoon of Vaseline in. The vaseline provides the smoothness while the lipstick adds the color.
Then stir both ingredients together and this is what the mixture should look like!
And this is what the lipstick tube and Vaseline container should look like!
Turn your stove off and grab some sort of funnel for easy emptying into the containers. I used a funnel I found in my cabinet!
Now, time to pour your new lip balm into it's container! This tends to be the most difficult part and if you could get someone to help you I would definitely advise you to. Lay down a towel before you start pouring, once again, to condense the mess. I had to use two containers because I used an entire tube of lip gloss and Vaseline.
And the pour beings!...
Perfect! Now onto the second container.
I was so satisfied with the final product, it came out GREAT!!
Close up the containers and you can put them in the refrigerator or freezer to make the liquid harden faster. If you're having trouble putting the lid on it's probably because the heat causes the plastic to expand, which can make it hard for the lid to fit. You can always put them in your refrigerator without the lid as long as it's in a safe place!
Let it sit for 30 minutes to an hour and make sure the liquid has hardened before you apply or you will be putting a bunch of mush on your lips! Yuck! I let mine sit in my refregerator for about an hour and here was my finished product!
I love love love the tint of the lip balm and I can't wait to apply!
Here's two pictures of what the tint of my lip balm looks like:
What do you think!?
I was VERY VERY happy with the way my lip balm turned out and I can't wait for the pink tint to shimmer in the summer sun! I chose to use a light color and make the lip balm have a pinkish tint to it, rather than a dark color. If you decide to use a darker color, the color will stand out more than the sparkly light pink did. This is a very fun and inexpensive project, lip balm/lip stick can cost up to 30+ dollars and this only cost $10.00! I plan on wearing my new lip balm ALL day tomorrow! I really hope everyone enjoyed reading my blog post and I hope you try out this DIY! Have a good weekend!
A special thanks to Cody for taking the pictures during the DIY!
CVS: http://www.cvs.com
How did you like this DIY? If you try this crafty project let me know and send pictures! Comment below with DIYs you'd like to see me blog about and don't forget to subscribe!


2 comments:
Great idea!!! I always love lip balm in the summer!! Unfortunately they never have the colors I like! This is a great way to "make my colors"! Awesome tip, love the step by step! CVS is great because they are so convenient and reasonably priced! Their make up selection is amazing and NYC has so many great colors. I can't wait to try this at home!
You Are so Cute Bri :) Great idea love your blog keep it going! <3
Post a Comment