Showing posts with label make up. Show all posts

Wednesday, October 16, 2013

Inexpensive (Halloween) Beauty Must-Haves!

Halloween is ABSOLUTELY one of my favorite holidays! I plan on doing many blogs throughout the month of October revolving around Halloween! So, obviously, today's post will be about.. You guessed it! Halloween! Well, Halloween beauty acessories!

I totally understand that as you grow, dressing up becomes more of a chore than something you look forward to. But who said you need to wear a full costume to be considered a "Halloween spirit"? I'm going to list some accessories that you can throw on and join in the Halloween fun!


Foam Wigs - These fabulous wigs can be found at Target. They range from $15-20. Throw on one of these fierce hair-do's, a basic black dress and you'll be set for the night!


Lip Tattoos - If you love doing make up, these lip tattoos are the perfect Halloween accessory for you! They're EXTREMELY easy to apply and only cost $9.99!
You can find more lip tattoos at Violent Lips!

Friday, September 13, 2013

Nail Polish - Favorite Colors for Fall!

Put away those summer shades and make room for some amazing and eccentric fall nail polish colors! Fall is definitely one of my favorite times of the year and nail polish is one of my favorite beauty products. Luckily, for a few moths during the year I get to combine my love for both fall and nail polish! I always try my best to keep up with the nail polish colors that are currently in style, I rocked mint on my nails and toes pretty much the whole summer! But, now, it's time to move on to fall and switch your shades!

Raspberry


Show off your chic side from day one with a bold, raspberry polish! It's an unexpected, darker shade that's more exciting than plain black nails, but not quite as overtly girly as a bright pink.

Try:  
1. "Laurel Canyon Lolita" by NCLA, $16, shopncla.com  
2. "Pulp Fiction" by Sonia Kashuk, $4.79, target.com  
3. "Intuition" by Seche, $8.50, Ulta and salons  
4. "Don't Make Me Wine" by China Glaze, $8, salons


Dark Cherry

If you and your crush have plans to walk through the park drinking maple lattes, give your mani a subtly romantic vibe with some this deep cherry polish. It's a bit more mysterious than your average red, and the darker shade pairs perfectly with cozy fall flannels!

Try:  
1. "Dinner Party" by Candie's, $8, kohls.com  
2. "From The Heart" by SpaRitual, $10, sephora.com
3. "Lost on Lombard" by OPI, $9, ULTA  
4. "Control Freak" by Sephora X, $9.50, sephora.com

Thursday, September 12, 2013

Fall Definig Beauty Products


Who doesn't love fall? I sure do! Once I feel the crisp air start to creep in, I immediately get super excited and start to prepare myself, my skin, and my wardrobe for fall! While it's extremely important to make sure your wardrobe matches the weather, it's also very important to change your beauty routines to match the weather, too. 
Cold air means chapped lips and cracked skin which is a huge no no! One very important thing to remember during the chilly months is to keep your body hydrated and drink lots of water to keep your lips fresh and your skin smooth! You also want to change your make up products to blend in with the fall season; hot pink eyeshadow isn't as cute for fall as it is for summer!

Since fall is right around the corner, I've gathered up some fall beauty products that I am DYING to try this fall! So, put your credit card down, stop buying oversized sweaters and direct your attention toward some fall defining makeup!


Eyes: Colored Mascara

Enhance your eye color with mascaras in shades other than black and brown! These might look scary, but one swipe provides just a hint of color that will subtly brighten up your peepers. Pick one in a shade that’s opposite your iris on the color wheel for the ultimate enhancement! 

WINK Mascara, $20, butterlondon.com

Saturday, August 31, 2013

Tumblr Thoughts

A website I frequently use is Tumblr. It's a blog based website, mostly for quotes, pictures and gifs. Whenever I have time to spare I go on my Tumblr app and reblog interesting things onto my personal tumblr page. Yesterday as I was reblogging some new stuff, I got the idea to do a blog post on some of the stuff that can be seen on Tumblr as well as things I like to post onto my personal tumblr (tumblr.com/brimazzuca). Check it out below!

Tuesday, August 13, 2013

Transition Trends From Summer to Fall!

One of my favorite things to do during my downtime is create sets on Polyvore! Polyvore is an app (based off of Polyvore.com) that is loaded with merchandise that allows you to create different "sets." They have a bunch of categories that you get to choose from and you select which items you like and they get put on a blank canvas; then you get to arrange it however you want. Sometimes I sit there for hours and scroll through the many many pages of items and find current trends that I'm into at the moment and create my own mini scene. I'm really into it and I want you to check out a few Polyvore "sets" that I have created revolving around some trends that I am gushing over! The trends listed below are ones that can be worn during summer and throughout fall, allowing you to easily transition your wardrobe from season to season. Check them out!


poly1

This fall is going to revolve around pastels! They're very flattering and versatile. They're perfect for the transition from the summer season into fall. I paired the pastel color-blocked dress with some mesh heels and a tan cross-body bag; very simple yet it still makes a statement! I also chose to go with neutral make up colors to give the colors in the dress more room to pop!

Looking to shop for some pastels?

 Forever 21 "High Waist Ankle Pants" - originally $17.80 ON SALE $11.99

Forever 21 "Cutout Chiffon Shirt" - originally $19.80 ON SALE $15.90


 Forever 21 "Faux Leather Peplum Jacket" - originally $27.80 ON SALE $25.99 

poly2
From pretty pastels to dark and grunge! Another trend prediction for fall is cut off flannels! I feel like they're going to be HUGE. A cutoff flannel won't be as hot as you would be in a long sleeve flannel but they also warm you up more than a tank top. Don't forget to pair the outfit with your favorite pair of Toms! And of course, you could never go wrong with a cross-body bag, a bowler hat, some electronics and your favorite pair of circle sunglasses!

 Looking to shop for some items like the ones above?


Forever 21 "Self-Tie Plaid Shirt" - originally $14.80 ON SALE $9.99

Forever 21 "Sleeveless Plaid Shirt" - $14.80

Forever 21 "F3328 Round Sunglasses" - $5.80

poly3
The upcoming trend portrayed in this Polyvore set is POPS OF COLOR! Just because summer is ending doesn't mean that neon can't stick around for a little while longer. I love the neon paired with basic neutral colors; it allows you to stand out without over-doing it. And isn't this background just adorable? Fall is the time where basic shades are really accentuated; which is why I love the neon, it's a new spin on an old trick!

Looking for some pops of color?

Forever 21 "Cool-Girl Colorblocked Crossbody" - $24.80

Forever 21 "Two-Tone Scarf" - $7.80

Forever 21 "Neon Pop Maxi Dress" - $27.80


Unfortunately you will not see any of the sets above on my Polyvore account because I had to make them on my work computer in order to get a screen shot of them. I have many other great sets, though! If you already have a Polyvore or if you plan on making one, you can follow me (briannaonabudget) and I would love to look at some of your sets! 


In other news, I got a new CAMERA! Thanks to my, wonderful, boyfriend Cody. Starting (most likely) this Sunday I will be posting video blogs each week! It's something that I've wanted to do for a while and definitely something I'm looking forward to. So, keep an eye out for tomorrow's blog post as well as an upcoming VIDDDEOO!


PS (to those who watch Pretty Little Liars) - I'm looking forward to tonight's episode! Who do you think pushed Jenna into the lake?


What're some things you'd like to see me talk about/do during my videos? Comment below to share!

Friday, August 9, 2013

FRI"DIY" - Make Your Own Bath Bomb!

Friday is here! And not only does that mean it's time for the wonderful weekend, it means it's time for a new DIY project! The idea for this DIY came to me last night while I was taking a bath. Baths are one of the greatest forms of relaxation and I frequently engage in the activity. Anyway, last night I was taking a nice, warm, relaxing bath wishing I had some sort of amazing smelling bubble bath or bath bomb! So, I grabbed my phone and began looking online for places I could stop by in the morning to pick some bath essentials. The more I browsed, the more I realized that most of the bath accessories I wanted were a little too pricey for me; which led me to wonder how much it costs them to make the product. Then that little light bulb went off in my head and I was determined to make my own, cost friendly, bath bomb! And here we are!


What you'll need:


Sea Salt or any kind of big grain salt - $1.99


Cream of Tartar - $2.99 ea. This is what makes the bath bomb fizz!


Almond Oil - $3.99. I chose Almond Oil because it's great for enhancing the elasticity of your skin, preventing stretch marks and wrinkles. And it smells GREAT!


Cake Pop Mold - $4.99. You can buy any sort of mold you would like or use any one you have laying around your house. I decided to do mini bath bombs.


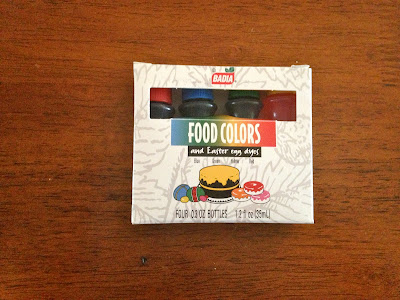
Food Coloring - $1.99. This part is optional, you only have to add color to the bath bomb if you would like too!


Baking Soda - $2.99

I got everything for this DIY at Shop Rite and in total it came out to around $23.00. This is a great deal because I made about 12 bath bombs which means each cost LESS THAN $2.00.

You'll also need:

Friday, August 2, 2013

FRI"DIY" - Make Your Own Nail Polish!

The weekend is finally here! I bet everyone is really excited for that.  Not only am I excited about the weekend, I'm excited for today's "DIY" blog post! Let me start by saying that in yesterday's post I accidentally wrote I was 250 views away from 2,000 in stead of 3,000, which I didn't notice until 5 hours after the blog was posted and it bummed me out. However, I reached over 3,000 views last night which definitely improved my mood! Anyway, today we are going to make our own nail polish! The only thing I love more than nail polish is DIYs, so being able to combine my love for the two started my day off on the right foot. It was one of the easiest projects I have done and it was very inexpensive! Let's get started!

What you'll need for this DIY:


In no specific order:


1) 1-2 bottles of clear nail polish - 99 cents each.


2) Eyeshadow pallet of your choice (you could also use an old one of yours) - $4.99


3) Q-Tips - $1.50


4) A piece of paper!

I got all of the items I needed from CVS (besides the piece of paper) and spent around $10.00 in total; however you may have these items laying around your house and you can do this project without spending any money! The brands of nail polish and make up I used are NYC.


Time to start!


Open your eyeshadow and begin scraping at (using a butter knife or some sort of sharp object) the color of your choice. Don't scrape all of the color out at once because it will be harder to pour onto the sheet of paper.


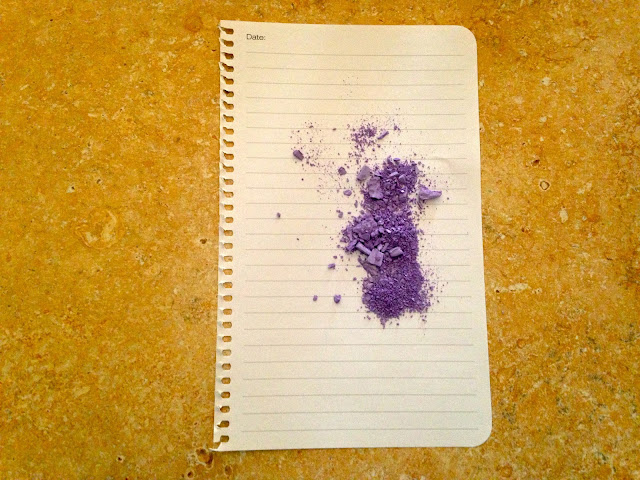
Pour what you've scraped onto the paper.


And this is what your eyeshadow should look like: 


Keep on scraping until you've emptied out the entire eyeshadow section of your choice and pour the excess eyeshadow onto the paper!


Once the eye shadow container is completely empty, make sure you crush the eyeshadow color down into powder because big chunks will not fit into the nail polish bottle.


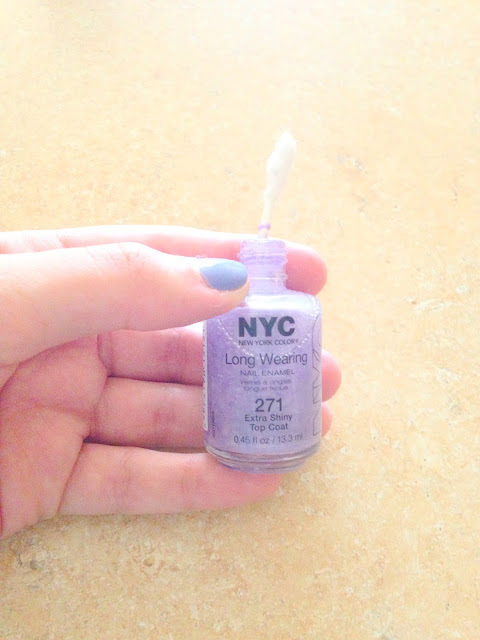
Next, open up one of your clear nail polish bottles and pour a little of the nail polish into your trash can to make room for the powder. DO NOT pour the nail polish into your sink, it will clog your drain.


 Time to start pouring! With the lid off of the nail polish remover, fold the paper in half (with the eye shadow in it) to make the pour 10x easier.


If you get a little eyeshadow on the table it's perfectly fine because it's easy to wipe up and you could always brush it right back onto the paper to pour back into the bottle!


This is what your nail polish should look like after the pour.


Pretty cool, right? Take your Q-Tips and pull the cotton off one of the ends to use as a mixing tool to mix the eye shadow and clear nail polish.


Once the cotton is ripped off either side, begin mixing!


Mix it for about two minutes and you will see your final product!


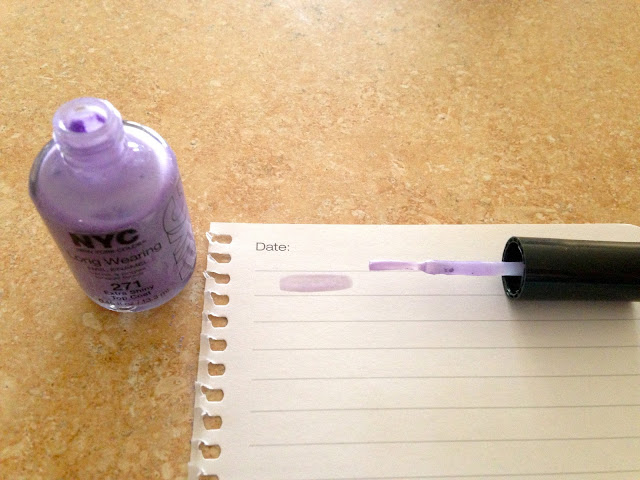
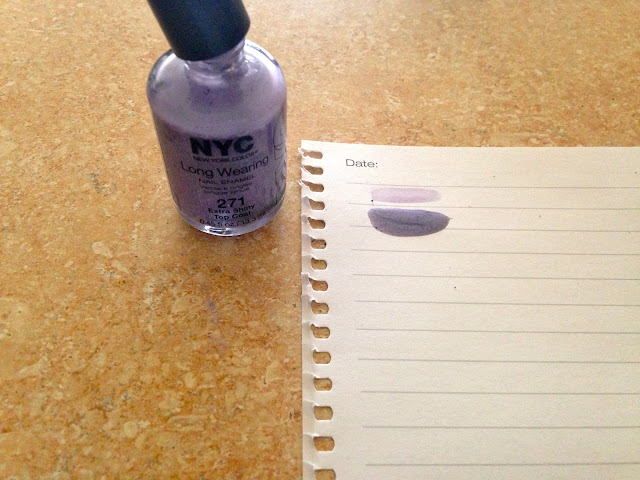
To ensure you're happy with the color, grab a piece of paper and test it out!


The color was definitely too light for my liking, so I followed the same steps as above and added some black eye shadow to darken it.


And here was my final product (in comparison to the first shade)! I was very very happy with it.


The most perfect purple color I could've asked for!

I also bought a second bottle of clear nail polish that could be used as a top coat or to make another color! You could always be bold and mix colors or choose very funky greens or blues. Adding darker colors will darken the shade as adding lighter ones will lighten it and possibly make it more transparent looking. This particular DIY only took me about 20 minutes and didn't require any heat or craft tools. Like I mentioned above, you could save yourself $10.00 and use eyeshadows and nail polishes you already have at home!

I really hope you enjoyed this weeks FRI"DIY" blog and I'm already looking forward to next weeks!


Links to the places/products mentioned above:
CVS: http://www.cvs.com
NYC Beauty: http://newyorkcolor.com


What do you think of this DIY? What colors are you planning on trying? If you do try this out, please send pictures!