www.theatticthriftstore.storenvy.com
Showing posts with label thrift. Show all posts
Showing posts with label thrift. Show all posts
Sunday, October 27, 2013
Friday, August 16, 2013
FRI"DIY" - Tassel Necklaces (On A Budget)
Hello and happy Friday! I always get really excited for Fridays, not only because it's the weekend, but because it means I get to try out a new DIY! This weeks DIY is one of my favorites. I've been dying for a tassel necklace for fall! They're adorable and match with mostly everything. They're definitely funky, new and something I'm willing to try out!
If you haven't seen tassel necklaces yet, here are some I found online at Anthropologie:
Anthropologie "Neon Plume Necklace" - $38.00
Anthropologie "Tassel Plume Necklace" - $38.00
Anthropologie's website has a bunch of tassel necklaces and they range in price from $38-500+.
I loved their tassel necklaces so much that I decided I wanted to make my own.. On a budget! I got all of my products from AC Moore and it was one of the most simple DIY's I've done! Let's get started on your trendy tassel necklace.
I loved their tassel necklaces so much that I decided I wanted to make my own.. On a budget! I got all of my products from AC Moore and it was one of the most simple DIY's I've done! Let's get started on your trendy tassel necklace.
The cost of this DIY is completely up to you and how many necklaces you want to make. I knew I would want to make more than one so I picked up a few extra items.
Tassels - $1.99 ea.
Jars of beads - $2.99 ea.
Labels:
accessory,
DIY,
do it yourself,
fall,
fashion,
floral,
fun,
fun facts,
hot,
ideas,
inspiration,
inspirational,
look for less,
love,
Ootd,
outfit,
outfit of the day,
thrift,
trend,
trends

Friday, August 2, 2013
FRI"DIY" - Make Your Own Nail Polish!
The weekend is finally here! I bet everyone is really excited for that. Not only am I excited about the weekend, I'm excited for today's "DIY" blog post! Let me start by saying that in yesterday's post I accidentally wrote I was 250 views away from 2,000 in stead of 3,000, which I didn't notice until 5 hours after the blog was posted and it bummed me out. However, I reached over 3,000 views last night which definitely improved my mood! Anyway, today we are going to make our own nail polish! The only thing I love more than nail polish is DIYs, so being able to combine my love for the two started my day off on the right foot. It was one of the easiest projects I have done and it was very inexpensive! Let's get started!
What you'll need for this DIY:
In no specific order:
1) 1-2 bottles of clear nail polish - 99 cents each.
2) Eyeshadow pallet of your choice (you could also use an old one of yours) - $4.99
3) Q-Tips - $1.50
4) A piece of paper!
Time to start!
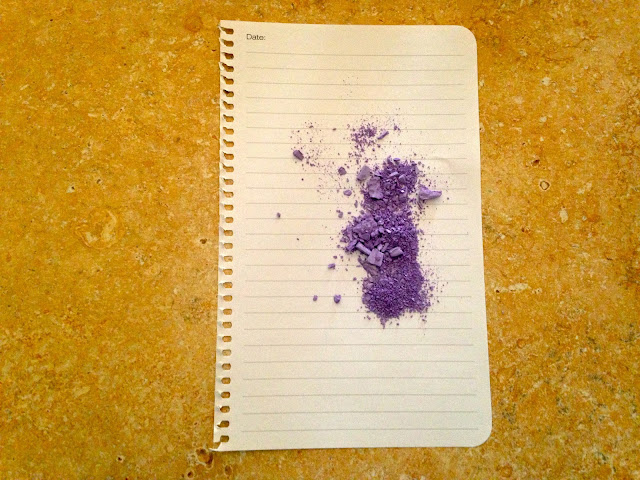
Open your eyeshadow and begin scraping at (using a butter knife or some sort of sharp object) the color of your choice. Don't scrape all of the color out at once because it will be harder to pour onto the sheet of paper.
Pour what you've scraped onto the paper.
And this is what your eyeshadow should look like:
Keep on scraping until you've emptied out the entire eyeshadow section of your choice and pour the excess eyeshadow onto the paper!
Once the eye shadow container is completely empty, make sure you crush the eyeshadow color down into powder because big chunks will not fit into the nail polish bottle.
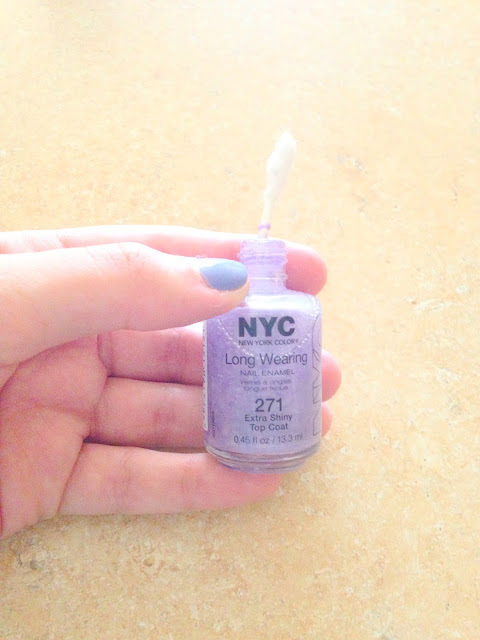
Next, open up one of your clear nail polish bottles and pour a little of the nail polish into your trash can to make room for the powder. DO NOT pour the nail polish into your sink, it will clog your drain.
Time to start pouring! With the lid off of the nail polish remover, fold the paper in half (with the eye shadow in it) to make the pour 10x easier.
If you get a little eyeshadow on the table it's perfectly fine because it's easy to wipe up and you could always brush it right back onto the paper to pour back into the bottle!
This is what your nail polish should look like after the pour.
Pretty cool, right? Take your Q-Tips and pull the cotton off one of the ends to use as a mixing tool to mix the eye shadow and clear nail polish.
Once the cotton is ripped off either side, begin mixing!
Mix it for about two minutes and you will see your final product!
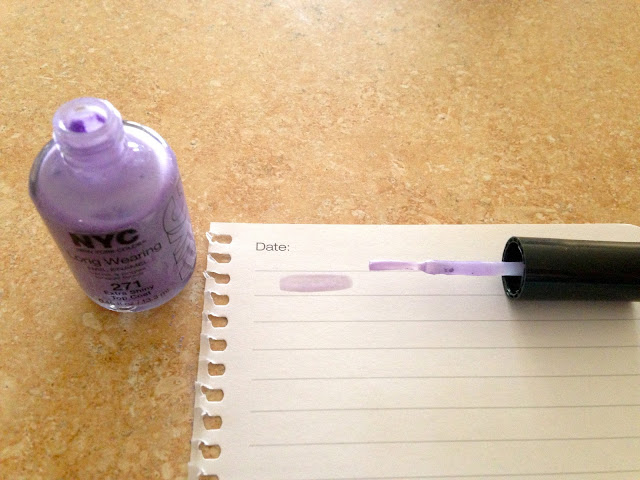
To ensure you're happy with the color, grab a piece of paper and test it out!
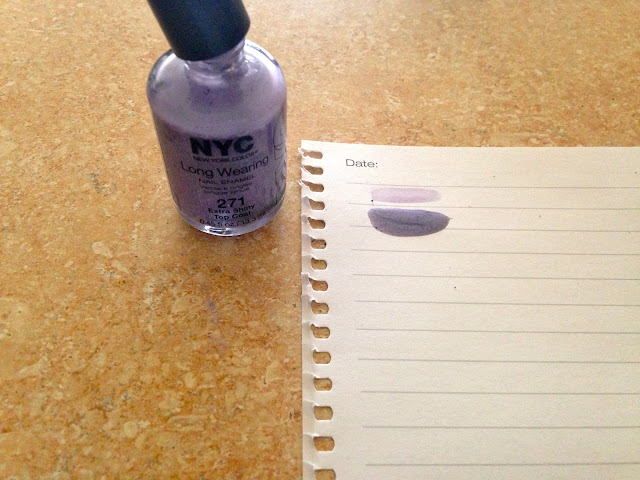
The color was definitely too light for my liking, so I followed the same steps as above and added some black eye shadow to darken it.
And here was my final product (in comparison to the first shade)! I was very very happy with it.
The most perfect purple color I could've asked for!
I also bought a second bottle of clear nail polish that could be used as a top coat or to make another color! You could always be bold and mix colors or choose very funky greens or blues. Adding darker colors will darken the shade as adding lighter ones will lighten it and possibly make it more transparent looking. This particular DIY only took me about 20 minutes and didn't require any heat or craft tools. Like I mentioned above, you could save yourself $10.00 and use eyeshadows and nail polishes you already have at home!
I really hope you enjoyed this weeks FRI"DIY" blog and I'm already looking forward to next weeks!
Links to the places/products mentioned above:
CVS: http://www.cvs.com
NYC Beauty: http://newyorkcolor.com
What do you think of this DIY? What colors are you planning on trying? If you do try this out, please send pictures!
Friday, July 26, 2013
FriDIY! Make Your Own Lip balm!
HAPPY FRIDAY! The weekend is finally here and I'm sure many people are very excited about that! Since summer is here, beautiful weather comes along with it; allowing you to go to the beach, lay out by the pool and relax! Another thing that tends to come along with summer is chapped lips! I have such trouble with my lips being chapped during the summer season. Along with keeping my body very hydrated by drinking lots of water, which helps with chapped lips, another thing I am very persistent with is applying lip balm/chap stick. I am a huge sucker for lipstick because I am intrigued by all the fun colors you get to choose from. Whenever I'm in line ready to purchase my lipstick I always wish I could find a chap stick in the color I want. Then, suddenly, a light bulb went off in my head.. which led me to the idea of making my own lip balm!
Ever since college I've started shopping at CVS. They have GREAT prices and you can sign up for their "Extra Care Card" which offers you coupons and "Extra Bucks." The coupons are great and the more you spend the more you get rewarded with Extra Bucks. Extra Bucks is CVS cash that you can put toward your purchase lowering the price! After every purchase at CVS, you'll get your receipt with sooooo many coupons attached to it as well as how much "Extra Bucks" you've acquired. It also informs you of the great sales that will be going on next week! I highly suggest that you get all of your DIY needs for this project from CVS and get your own "Extra Care Card!"
Okay moving on! The items you will need for this DIY is vaseline, your choice of lipstick, and a small container to put your new lip balm into!
Ever since college I've started shopping at CVS. They have GREAT prices and you can sign up for their "Extra Care Card" which offers you coupons and "Extra Bucks." The coupons are great and the more you spend the more you get rewarded with Extra Bucks. Extra Bucks is CVS cash that you can put toward your purchase lowering the price! After every purchase at CVS, you'll get your receipt with sooooo many coupons attached to it as well as how much "Extra Bucks" you've acquired. It also informs you of the great sales that will be going on next week! I highly suggest that you get all of your DIY needs for this project from CVS and get your own "Extra Care Card!"
Here's an example of what Extra Bucks look like:
Pictured above are the items I purchased from CVS and in total it came to around $10.00. The 5 piece travel kit contained perfect containers for lip balm! I didn't mind buying the travel kit because I know it will come into use later and it was only $5.99!
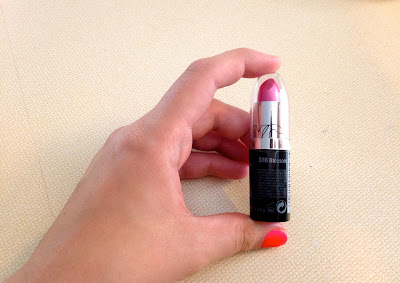
The lipstick is called "Blossom" by NYC. It was 99 cents and I fell in love with the shimmery pink color; so perfect for summer!
I decided on a small container of Vaseline and it was only $1.75!
Time to get started on the DIY!
Labels:
blog,
chap stick,
cheap,
DIY,
fashion,
fun,
inexpensive,
inspiration,
lip gloss,
lipstick,
make up,
shopping,
theme,
thrift,
travel

Tuesday, July 23, 2013
Birthday (On A Budget) Part 2!
Hello to all reading this blog post! Thank you for stopping by :) I'm catching up on some Pretty Little Liars while I write this blog post! I'm very new to the TV show and I'm liking it so much that I've been breezing through episodes! I'm currently watching the third season on Netflix to try and catch up with season four (which is on TV) and I'm really enjoying it so far!
Anywho, in my last blog I mentioned that I wanted to talk about Cody's birthday dinner but I got a little distracted blabbing on about his birthday party. So, onto the fabulous birthday dinner! We went to eat with Cody's sister, brother, sister in law, father and his fathers girlfriend. It was such a great time and I was so happy to see everyone! Before I start on where we went and how AMAZING everything was I'm going to post some pictures of my outfit from that night!
I paired a white baggy button-up blouse with a tight denim acid wash skirt and strappy sandals. The acid wash skirt is a size medium from Pac Sun. It's high-waisted and it was $39.00. One thing you should ALWAYS splurge on is denim; denim will last forever! The white baggy blouse has gold buttons and is also a size medium. I decided that I didn't want to wear it tucked in, so I let it flow over the skirt. It has a really nice fit and was soo comfortable. I wore a simple black (kind of) sports-bra garment underneath the sheer blouse and loved the way it looked! Especially because my strappy sandals (from H&M) were black also. The blouse is from Charlotte Russe and was $14.95. Such a steal! The shoes were $12.00, so, all together my outfit came to $66.95! A full special occasion outfit from a retail store for under $75.00! Sounds like smart shopping to me!
Here's what the outfit looked like put together:
Subscribe to:
Posts (Atom)


