Showing posts with label shopping. Show all posts

Tuesday, September 10, 2013

Model Confession - "Why I Quit Fashion Week"

Fashion Week is something that is looked forward to, by many people, for months and months. A lot of time, hard work and preparation goes into each Fashion Week pre-party, after party, event and Fashion Show. If you're not sure what Fashion Week is.. it's a fashion industry event, lasting approximately one week, which allows fashion designers, brands or "houses" to display their latest collections in runway shows and buyers and the media to take a look at the latest trends. Most importantly, these events let the industry know what's "in" and what's "out" for the season.

Now, while this seems fun and exciting, it can be tiring and very stressful to some people; especially the models. While I was doing my daily browse through Cosmopolitan's website, I came across an article called "Why One Model Quit Fashion Week." This article immediately interested me because who would ever want to drop out of something as fabulous as Fashion Week? However, as I began to read, I started to understand why she made the wise decision. 


The life of a tall, gorgeous runway model seems glamorous and heavenly. But for this model, walking in fashion shows was anything but.


Modeling isn't all drinking Champagne on yachts and being told you're fabulous. Runway modeling especially can be brutal. Ahead, one anonymous model shares the story of why she left the runways.


Wednesday, August 28, 2013

Superb Student Discounts (Part 2)

Good morning! Yesterday, I wrote a post on some great student discounts from your favorite retail stores. As I was researching and writing the list, I wondered if retail stores were the only places to offer student discounts. After an hour or so of searching and typing, I got a great list together of hang out and food spots that offer amazing student discounts. Let's start saving money!

Cultural Experiences and Entertainment

AMC Theatres: student discounted movie tickets every Thursday

The Art Institute of Chicago: $50 annual student membership, plus other various discounts within the Art Institute

Broadway in Chicago: Ticket prices as low as $14.50 for select performances


Tuesday, August 27, 2013

Superb Student Discounts!

Most people are not too excited about the start of another school year but I am overly excited because the start of school means the start of student discounts! Back to school is a huge deal for most retailers and it tends to bring a lot of money into their stores. Parents take their children out (or the children just go alone) and start to stock up on some fresh clothes for the school year. If you're in the mall and you're torn between two stores and one is offering a student discount, which would you shop at? The one with the discount of course! Student discounts are a great feeling because you work very hard in school all year long and deserve the discount awarded to you by your favorite retailer.

Retailers that offer student discounts:

1. Urban Outfitters - 10% off (on select dates only)
2. Topshop - 10% off
3. Shoebuy.com - 10% off
4. Ralph Lauren Rugby - 15% off
5. The Limited - 15% off

Tuesday, August 20, 2013

Attention All College Freshman!

A few days ago, I got asked to write a blog on college essentials and advise for incoming freshman; which is such a great idea! Why didn't I think of that?

I decided that I would start with the advise part of the blog since it would consist of a lot of writing.

I had a ton of questions that I wish I would've asked before leaving for college and I faced a lot of things that I wasn't prepared for. I'm not going to lie, I was TERRIFIED to start college. I was also a little frustrated because I was already a freshman in high school and now I had to start all over as a freshman again; however, college is very different than high school. For example, you're living on your own, completely on your own. You will have to cook, clean and decide when you want to do your homework and study because there will not be anyone breathing down your neck telling you to do those things.

Starting with food, I would definitely learn some quick recipes that you can whip together before or after class. When I was going away to school I didn't even think about cooking, it didn't cross my mind, I just figured I would eat whatever I could find and whatever was quick; which is something you DO NOT want to do. Take a day to sit with your parents, or Google some easy recipes, and learn learn learn. You will ruin your body if you do not eat healthy. You will gain weight and all of the unhealthy food will run your body down and make you extremely tired; which isn't good because you need all the energy you can get in college!

Another important thing

Monday, August 19, 2013

Summer Sales!

The end of summer is the beginning of some great sales! I've been browsing the internet all weekend in search of the cutest items of clothing for the best prices possible! I know you're wondering, "Why would I want to buy summer clothes if fall is coming?" and I have the answer for you! Because most summer clothes can be transitioned into the fall season, since fall isn't as cold as winter. Fall serves as a medium between winter and summer and has a mild temperature; therefore, you can wear the new clothing you've purchased from the summer sales throughout fall. Also, why not stock up on some clothes for next spring/summer? It will be here before you know it! And imagine how exciting it would be to know you have a bunch of new clothes waiting to be worn! Definitely something to look forward to.

Let's start shopping!

Aeropostale "Sheer Cropped Crochet Tank" - $39.50 ON SALE $7.99

Wednesday, August 14, 2013

Fall's Hottest Trend: Baroque (On A Budget)

Good morning! It's Wednesday, already, which means Friday is just around the corner! I had such a hard time sleeping last night, so, I decided I would do some online shopping and came across a new trend that I'm loving: Baroque.


Baroque is taking the fall runways by storm. Baroque patterns on pieces of clothing actually originated from pieces of art. The [Baroque] style of art was described as an exaggerated motion and clear, easily interpreted detail to produce drama and tension. The main goal of Baroque is for the observer to easily notice the bold Baroque pattern; they want the arrangement to stand out. A lot of celebrities are taking part in the Baroque trend, too!


Although Baroque doesn't particularly have to ONLY be printed in black and gold, see how prominent the gold pattern is on Selena Gomez's dress? It's the first thing your eyes get drawn to. The neutral black color on the base of the dress allows the gold Baroque pattern to really pop! It's such a classy and elegant look! The pattern is so interesting; it makes you want to examine the whole dress and see if the pattern gets more interesting than it already is.

Here are some other celebs rocking Baroque:


Lea Seydoux wore a white Baroque dress with blue embroidery.


Zoe Saldana, on the cover of Harper's Bazzar, in a black and gold Baroque romper


Hayden Panettiere in a pair of Baroque Joe's Jeans

Friday, August 9, 2013

FRI"DIY" - Make Your Own Bath Bomb!

Friday is here! And not only does that mean it's time for the wonderful weekend, it means it's time for a new DIY project! The idea for this DIY came to me last night while I was taking a bath. Baths are one of the greatest forms of relaxation and I frequently engage in the activity. Anyway, last night I was taking a nice, warm, relaxing bath wishing I had some sort of amazing smelling bubble bath or bath bomb! So, I grabbed my phone and began looking online for places I could stop by in the morning to pick some bath essentials. The more I browsed, the more I realized that most of the bath accessories I wanted were a little too pricey for me; which led me to wonder how much it costs them to make the product. Then that little light bulb went off in my head and I was determined to make my own, cost friendly, bath bomb! And here we are!


What you'll need:


Sea Salt or any kind of big grain salt - $1.99


Cream of Tartar - $2.99 ea. This is what makes the bath bomb fizz!


Almond Oil - $3.99. I chose Almond Oil because it's great for enhancing the elasticity of your skin, preventing stretch marks and wrinkles. And it smells GREAT!


Cake Pop Mold - $4.99. You can buy any sort of mold you would like or use any one you have laying around your house. I decided to do mini bath bombs.


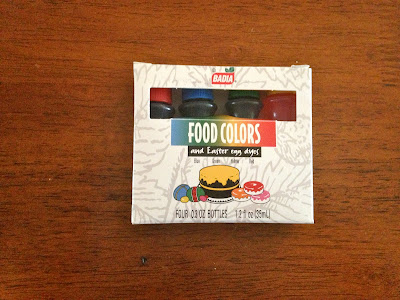
Food Coloring - $1.99. This part is optional, you only have to add color to the bath bomb if you would like too!


Baking Soda - $2.99

I got everything for this DIY at Shop Rite and in total it came out to around $23.00. This is a great deal because I made about 12 bath bombs which means each cost LESS THAN $2.00.

You'll also need:

Friday, August 2, 2013

FRI"DIY" - Make Your Own Nail Polish!

The weekend is finally here! I bet everyone is really excited for that.  Not only am I excited about the weekend, I'm excited for today's "DIY" blog post! Let me start by saying that in yesterday's post I accidentally wrote I was 250 views away from 2,000 in stead of 3,000, which I didn't notice until 5 hours after the blog was posted and it bummed me out. However, I reached over 3,000 views last night which definitely improved my mood! Anyway, today we are going to make our own nail polish! The only thing I love more than nail polish is DIYs, so being able to combine my love for the two started my day off on the right foot. It was one of the easiest projects I have done and it was very inexpensive! Let's get started!

What you'll need for this DIY:


In no specific order:


1) 1-2 bottles of clear nail polish - 99 cents each.


2) Eyeshadow pallet of your choice (you could also use an old one of yours) - $4.99


3) Q-Tips - $1.50


4) A piece of paper!

I got all of the items I needed from CVS (besides the piece of paper) and spent around $10.00 in total; however you may have these items laying around your house and you can do this project without spending any money! The brands of nail polish and make up I used are NYC.


Time to start!


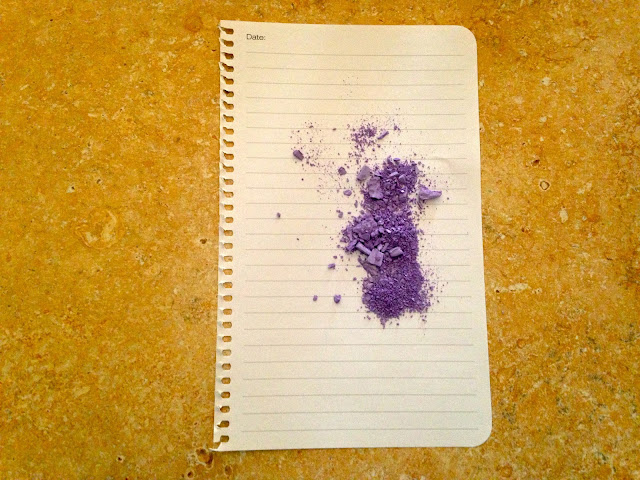
Open your eyeshadow and begin scraping at (using a butter knife or some sort of sharp object) the color of your choice. Don't scrape all of the color out at once because it will be harder to pour onto the sheet of paper.


Pour what you've scraped onto the paper.


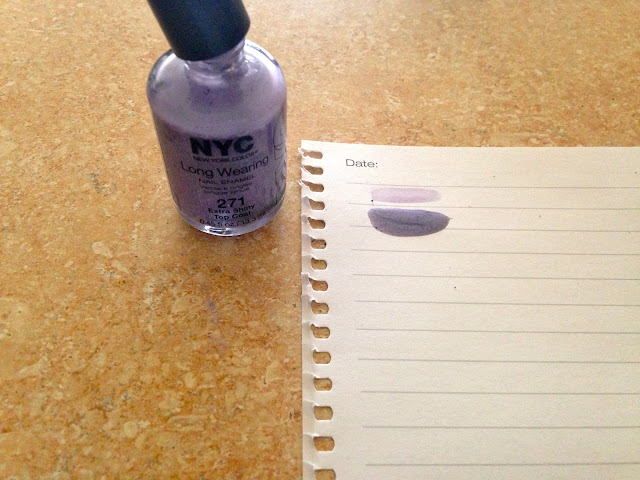
And this is what your eyeshadow should look like: 


Keep on scraping until you've emptied out the entire eyeshadow section of your choice and pour the excess eyeshadow onto the paper!


Once the eye shadow container is completely empty, make sure you crush the eyeshadow color down into powder because big chunks will not fit into the nail polish bottle.


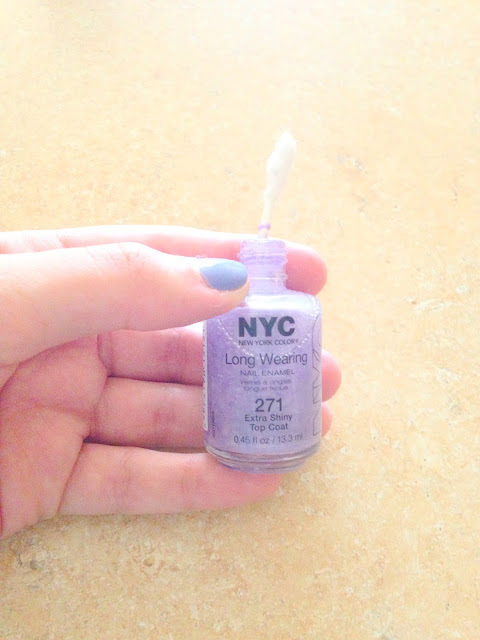
Next, open up one of your clear nail polish bottles and pour a little of the nail polish into your trash can to make room for the powder. DO NOT pour the nail polish into your sink, it will clog your drain.


 Time to start pouring! With the lid off of the nail polish remover, fold the paper in half (with the eye shadow in it) to make the pour 10x easier.


If you get a little eyeshadow on the table it's perfectly fine because it's easy to wipe up and you could always brush it right back onto the paper to pour back into the bottle!


This is what your nail polish should look like after the pour.


Pretty cool, right? Take your Q-Tips and pull the cotton off one of the ends to use as a mixing tool to mix the eye shadow and clear nail polish.


Once the cotton is ripped off either side, begin mixing!


Mix it for about two minutes and you will see your final product!


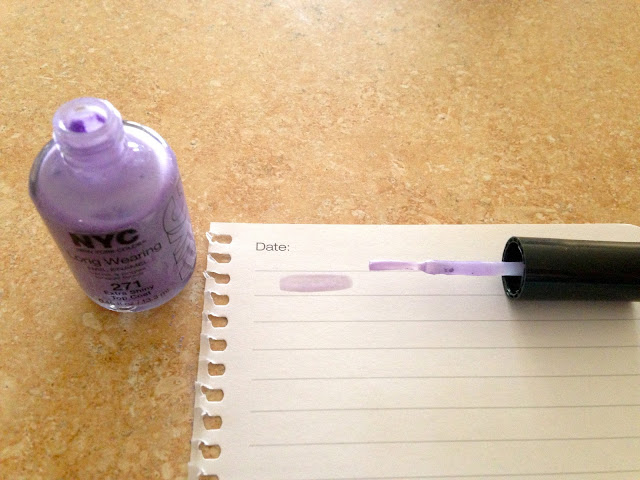
To ensure you're happy with the color, grab a piece of paper and test it out!


The color was definitely too light for my liking, so I followed the same steps as above and added some black eye shadow to darken it.


And here was my final product (in comparison to the first shade)! I was very very happy with it.


The most perfect purple color I could've asked for!

I also bought a second bottle of clear nail polish that could be used as a top coat or to make another color! You could always be bold and mix colors or choose very funky greens or blues. Adding darker colors will darken the shade as adding lighter ones will lighten it and possibly make it more transparent looking. This particular DIY only took me about 20 minutes and didn't require any heat or craft tools. Like I mentioned above, you could save yourself $10.00 and use eyeshadows and nail polishes you already have at home!

I really hope you enjoyed this weeks FRI"DIY" blog and I'm already looking forward to next weeks!


Links to the places/products mentioned above:
CVS: http://www.cvs.com
NYC Beauty: http://newyorkcolor.com


What do you think of this DIY? What colors are you planning on trying? If you do try this out, please send pictures!
Monday, July 29, 2013

Make Your Monday Matter!

Monday is one of the most dreaded days of the week. Monday means the end of a relaxing and stress less weekend and the beginning of the hectic work week. For most people, waking up Monday morning is a task in itself; especially after sleeping in on the weekends. I figured I'd dedicate this blog post to inspirational quotes that will help you drag yourself out of bed on this beautiful Monday morning!!


Keep repeating this on your dreaded Monday morning, positivity is the key!


Take chances! You never know what great things can come out of it.


Luckily this Monday morning is one I've been looking forward to for weeks! Cody and I finally have off of work on the same day (which rarely happens). We "took a chance" and decided to do something we've never done before. We're on our way to Delaware for some fun adventures, shopping (because there's no sales tax) and good food! I'm really excited

Here's some pictures of my outfit for today!