Showing posts with label do it yourself. Show all posts

Wednesday, October 16, 2013

Inexpensive (Halloween) Beauty Must-Haves!

Halloween is ABSOLUTELY one of my favorite holidays! I plan on doing many blogs throughout the month of October revolving around Halloween! So, obviously, today's post will be about.. You guessed it! Halloween! Well, Halloween beauty acessories!

I totally understand that as you grow, dressing up becomes more of a chore than something you look forward to. But who said you need to wear a full costume to be considered a "Halloween spirit"? I'm going to list some accessories that you can throw on and join in the Halloween fun!


Foam Wigs - These fabulous wigs can be found at Target. They range from $15-20. Throw on one of these fierce hair-do's, a basic black dress and you'll be set for the night!


Lip Tattoos - If you love doing make up, these lip tattoos are the perfect Halloween accessory for you! They're EXTREMELY easy to apply and only cost $9.99!
You can find more lip tattoos at Violent Lips!

Saturday, October 5, 2013

Back from Vacation and Ready to Blog!

Hello everyone! I've missed blogging so much. I just got back from my vacation in Orlando, Florida. I went to Universal's Halloween Horror Nights as well as both theme parks. I definitely intend on making a post about that later in the week but for now I want to talk about a new nail polish brand that I stumbled upon!

The brand is called Julep and they have some of the most ahhhhmazing colors I've ever seen! The nail polish comes in a tube that resembles a lip gloss tube, which I think is extremely different and innovative! And the best part? They come out with new colors daily! They constantly update their website with new colors as well as their "retired" ones. I am a huge nail polish fan so, I was absolutely gushing over the funky and fun colors. I'm going to share some of my favorite colors off the Julep website with you!

 Esmeralda - $14.00

Candice - $14.00

Friday, August 30, 2013

FRI"DIY - Illuminating Candle Holder

Good afternoon and happy Friday! I know everyone is in a great mood today because, who doesn't love Friday? The reason I do is because I get to blog about DIY projects which happen to be one of my favorite down time hobbies. Today's DIY is very quick and easy but awesome! Anyone who knows me, knows I love candles; especially fall scented ones :-). Which is why you'll probably be seeing a lot of candle-based DIYs on my blog. Anywho, this blog is really simple and fun, only took about 15-20 minutes and I can show you in three short steps!


What you'll need:

A candle holder (of your choice) I purchased this one from The Christmas Tree Shops - $4.00

A glue gun, I purchased this one from A.C Moore and it was around $3.99. I would also grab extra glue sticks, too!

Mosaic Stones, I purchased the mini bags above from The Christmas Tree Shoppes, they were $1.99 each. I didn't need as many stones as I bought, I just figured it's better to buy more and have some left over than to be short stones. You can choose whichever colors you want *HOWEVER* they must be transparent (see through) or the light will not shine through them. I chose red, orange, yellow and clear because they're fall colors and I love fall!

Time to start!

Friday, August 23, 2013

FRI"DIY" - Mason Jar Candle Holders!

Good morning and happy Friday! Friday is definitely the best day of the week, right? I think everyone will agree when I say that the weekend is awesome! The weekend is my chance to have some down time and relax. My forms of relaxation are taking baths and reading. Another thing that helps me relax are candles, especially when candles are lot while I'm taking a bath or reading. I'm always so paranoid when I lite candles while taking a bath because I'm worried that they'll spill over (etc). Which is why I got the idea to combine two of my favorite things: mason jars and candles! Since mason jars are a great size, they allow the candle to be surrounded by the high walls of the jar to prevent spilling. After I got that idea, I said to myself, "Well, you can't just throw a candle in a mason jar and call it a day.. It has to be decorated!" Annnnnd here we are! Let's get started!

What you'll need:


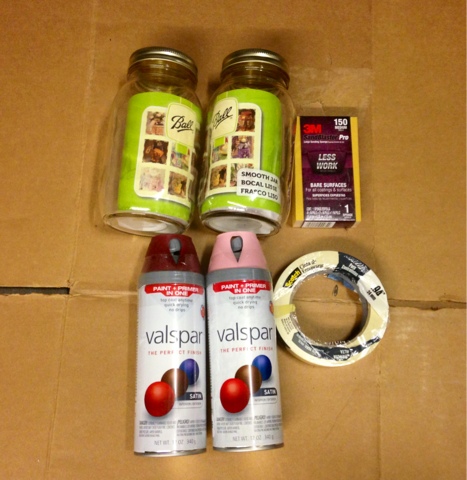
I got the mason jars from Michaels, the tape, spray paint, sanding bar and tape from Lowe's. Michaels had spray paint; however, it was $11.99 a bottle which is why I went to lowes.

Two mason jars - 2.99 ea.

Sanding sponge - 2.99 

Scotch painters tape - 1.99

Valspar spray paint - $5.99 ea.


Thursday, August 22, 2013

Three Awesome Videos That'll Help You Get Through Thursday

Good morning!  For today's "mini post" I was doing my daily scroll through Cosmopolitan's website, which I do every morning, and I came across a post called "Three Awesome Videos That'll Help You Get You Get Through the Rest of the Week" Those videos definitely improved my morning, which prompted me to search the web for my own awesome videos to blog about!

Check them out below!

One video I found is "16 of the Worst Feelings" and this video will definitely improve your mood since (hopefully) none of these things have happened to you so far today. Remember, things could always be worse!


This video is "9 Celebrity Facts that Might Explode Your Brain"


Tuesday, August 20, 2013

Attention All College Freshman!

A few days ago, I got asked to write a blog on college essentials and advise for incoming freshman; which is such a great idea! Why didn't I think of that?

I decided that I would start with the advise part of the blog since it would consist of a lot of writing.

I had a ton of questions that I wish I would've asked before leaving for college and I faced a lot of things that I wasn't prepared for. I'm not going to lie, I was TERRIFIED to start college. I was also a little frustrated because I was already a freshman in high school and now I had to start all over as a freshman again; however, college is very different than high school. For example, you're living on your own, completely on your own. You will have to cook, clean and decide when you want to do your homework and study because there will not be anyone breathing down your neck telling you to do those things.

Starting with food, I would definitely learn some quick recipes that you can whip together before or after class. When I was going away to school I didn't even think about cooking, it didn't cross my mind, I just figured I would eat whatever I could find and whatever was quick; which is something you DO NOT want to do. Take a day to sit with your parents, or Google some easy recipes, and learn learn learn. You will ruin your body if you do not eat healthy. You will gain weight and all of the unhealthy food will run your body down and make you extremely tired; which isn't good because you need all the energy you can get in college!

Another important thing

Saturday, August 17, 2013

Inexpensive Ideas for Your Upcoming Party!

I recently read an article on Seventeen.com called "How to Throw a Kickass Party (and Pay Your Rent)" and I absolutely fell in love with the article. I felt like I HAD to share the ideas they came up with. The editors at Seventeen talked about 5 easy DIYS that will make your party stand out, all while saving money! 


Light-Bright Coasters
Apply vinyl stickers to a glass tile, then spray-paint the whole tile. Remove stickers after 30 minutes. Use a sponge to apply a thin layer of Mod Podge (prevents chipping).
What you'll need:
• Spray paint
• Painter's tape
• Vinyl stickers
• Mod Podge
• Square glass tiles

Glitter-Bomb Champagne Flutes
Using painter's tape, mark off the area you don't want to cover (start a few inches below the rim). Pour nail polish into a bowl, then blot it onto a glass with a sponge. Peel the tape once the polish has fully dried. TIP: A shimmery shade looks sleeker than chunky sequins.
What you'll need:
• Champagne flutes
• Sparkly nail polish (shown above is Essie Nail Color in Beyond Cozy)
• Painter's tape
• Small sponge


Earn-Your-Stripes Serving Tray
Stencil a design using a ruler and chalk (or eyeball it!), then cover lines with long strips of metallic tape. Using a box cutter, slice the tape so it lies flush against any edges. TIP: Rectangular trays work better than round ones.
What you'll need:

Friday, August 16, 2013

FRI"DIY" - Tassel Necklaces (On A Budget)

Hello and happy Friday! I always get really excited for Fridays, not only because it's the weekend, but because it means I get to try out a new DIY! This weeks DIY is one of my favorites. I've been dying for a tassel necklace for fall! They're adorable and match with mostly everything. They're definitely funky, new and something I'm willing to try out!

If you haven't seen tassel necklaces yet, here are some I found online at Anthropologie:

Anthropologie "Neon Plume Necklace" - $38.00

Anthropologie "Tassel Plume Necklace" - $38.00

Anthropologie's website has a bunch of tassel necklaces and they range in price from $38-500+.

I loved their tassel necklaces so much that I decided I wanted to make my own.. On a budget! I got all of my products from AC Moore and it was one of the most simple DIY's I've done! Let's get started on your trendy tassel necklace.


The cost of this DIY is completely up to you and how many necklaces you want to make. I knew I would want to make more than one so I picked up a few extra items.


Tassels - $1.99 ea.

Jars of beads - $2.99 ea.

Beading wire - $3.99 ea.

Mini Diagonal Cutter - $2.99 ea.


Thursday, August 15, 2013

"WTF" Fun Facts!

Hello everyone! I apologize for writing this post so late but I've had such a busy day. I also stopped to pick up everything that is needed for tomorrow's DIY project! I'm so excited. Since I'm going to start uploading videos every Sunday, I've decided to change Thursdays to "mini post" days. Mini posts allow me to still put up a blog, just without all of the usual content; it's mainly for the shorter topics that I want to talk about. Today, I stumbled across a website that offers all of these very very interesting facts and I decided I would love to share some of my favorites with you!


Sunday, August 11, 2013

Duct Tape DIY's

It's already 7:00 pm! Today flew by before I even had the chance to consider blogging! Sorry for the late post, I had a birthday in my family and we celebrated all day with a shopping spree (on a budget of course)! Now, here I am blogging at 7:45 and I feel bad because it's super late but I'm going to make up for it!

For today, Sunday's, "mini post" I found this GREAT YouTube video from a very famous vlogger Blair Fowler. I was scrolling through her videos and this one caught my eye, especially because school is starting back up soon. The video is based on a very fun and inexpensive DIY for some back to school accessories.

All you'll need is an exacto knife and some duct tape! Yes, I said duct tape. Hard to believe, right? Watch below!

Friday, August 9, 2013

FRI"DIY" - Make Your Own Bath Bomb!

Friday is here! And not only does that mean it's time for the wonderful weekend, it means it's time for a new DIY project! The idea for this DIY came to me last night while I was taking a bath. Baths are one of the greatest forms of relaxation and I frequently engage in the activity. Anyway, last night I was taking a nice, warm, relaxing bath wishing I had some sort of amazing smelling bubble bath or bath bomb! So, I grabbed my phone and began looking online for places I could stop by in the morning to pick some bath essentials. The more I browsed, the more I realized that most of the bath accessories I wanted were a little too pricey for me; which led me to wonder how much it costs them to make the product. Then that little light bulb went off in my head and I was determined to make my own, cost friendly, bath bomb! And here we are!


What you'll need:


Sea Salt or any kind of big grain salt - $1.99


Cream of Tartar - $2.99 ea. This is what makes the bath bomb fizz!


Almond Oil - $3.99. I chose Almond Oil because it's great for enhancing the elasticity of your skin, preventing stretch marks and wrinkles. And it smells GREAT!


Cake Pop Mold - $4.99. You can buy any sort of mold you would like or use any one you have laying around your house. I decided to do mini bath bombs.


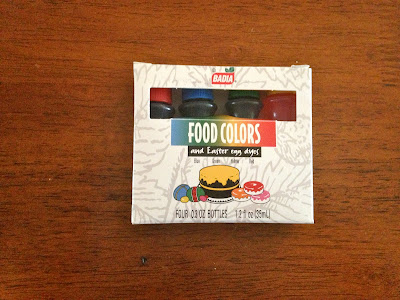
Food Coloring - $1.99. This part is optional, you only have to add color to the bath bomb if you would like too!


Baking Soda - $2.99

I got everything for this DIY at Shop Rite and in total it came out to around $23.00. This is a great deal because I made about 12 bath bombs which means each cost LESS THAN $2.00.

You'll also need: