Showing posts with label friends. Show all posts

Friday, August 9, 2013

FRI"DIY" - Make Your Own Bath Bomb!

Friday is here! And not only does that mean it's time for the wonderful weekend, it means it's time for a new DIY project! The idea for this DIY came to me last night while I was taking a bath. Baths are one of the greatest forms of relaxation and I frequently engage in the activity. Anyway, last night I was taking a nice, warm, relaxing bath wishing I had some sort of amazing smelling bubble bath or bath bomb! So, I grabbed my phone and began looking online for places I could stop by in the morning to pick some bath essentials. The more I browsed, the more I realized that most of the bath accessories I wanted were a little too pricey for me; which led me to wonder how much it costs them to make the product. Then that little light bulb went off in my head and I was determined to make my own, cost friendly, bath bomb! And here we are!


What you'll need:


Sea Salt or any kind of big grain salt - $1.99


Cream of Tartar - $2.99 ea. This is what makes the bath bomb fizz!


Almond Oil - $3.99. I chose Almond Oil because it's great for enhancing the elasticity of your skin, preventing stretch marks and wrinkles. And it smells GREAT!


Cake Pop Mold - $4.99. You can buy any sort of mold you would like or use any one you have laying around your house. I decided to do mini bath bombs.


Food Coloring - $1.99. This part is optional, you only have to add color to the bath bomb if you would like too!


Baking Soda - $2.99

I got everything for this DIY at Shop Rite and in total it came out to around $23.00. This is a great deal because I made about 12 bath bombs which means each cost LESS THAN $2.00.

You'll also need:

Thursday, August 8, 2013

Back to School Bags! (On A Budget)

Good morning! It's been raining non-stop in New Jersey but it looks like it may clear up today! I hope it does because I really have to start squeezing in those beach days before school starts again! Although I love the summer and the beach, I really enjoy school, too. I love getting dressed for class, meeting new friends and professors and learning things that broaden your knowledge beyond belief. Think about it, each little thing, or topic, that you learn something about is one more thing that you know. If you pay very close attention in every class, you will be filled with so much knowledge that you won't know what to do with it! Every year before school starts, I go shopping for a "School Bag;" which is a bag I could use for some of the semester and one I can cram all of the stuff I need to use for class in. These days, most people just carry a handbag and call it quits because they think backpacks aren't the most stylish things; however I'm going to show you some greatly priced bags that can accommodate your love for fashion as well as those troublesome textbooks!

 Joyce Leslie "Into the Wild Fringe Tote" - Originally $19.99 ON SALE: $10.00
Fringe is great for the fall! As well as the black color with golden accents.

Joyce Leslie "Day in the City Spiked Mint Tote" - Originally $19.99 ON SALE: $10.00
Mint is the most popular color this season and so are the spiked appliques on this fashionable tote!

Wet Seal "Geek Canvas Tote" - $9.90
Steal Hayley Willams' style with this adorable geek tote bag!

Sunday, August 4, 2013

Give A Little Love.. "Mini Post"

Good afternoon! I woke up about an hour and a half ago and I just can't bring myself to get out of bed. Probably because today is Sunday and I always feel like snuggling in on Sundays, however, I have a birthday party to go to tonight so I need to get myself up and dressed to go pick out an outfit! Well, the previous sentences have absolutely nothing to do with today's blog post but they're still relevant to how relaxing Sundays tend to be. For this Sunday's "mini post" I found an amazing video on YouTube that definitely showed me life in a new perspective and I couldn't help it.. I HAVE to post it and share it with everyone:

Friday, August 2, 2013

FRI"DIY" - Make Your Own Nail Polish!

The weekend is finally here! I bet everyone is really excited for that.  Not only am I excited about the weekend, I'm excited for today's "DIY" blog post! Let me start by saying that in yesterday's post I accidentally wrote I was 250 views away from 2,000 in stead of 3,000, which I didn't notice until 5 hours after the blog was posted and it bummed me out. However, I reached over 3,000 views last night which definitely improved my mood! Anyway, today we are going to make our own nail polish! The only thing I love more than nail polish is DIYs, so being able to combine my love for the two started my day off on the right foot. It was one of the easiest projects I have done and it was very inexpensive! Let's get started!

What you'll need for this DIY:


In no specific order:


1) 1-2 bottles of clear nail polish - 99 cents each.


2) Eyeshadow pallet of your choice (you could also use an old one of yours) - $4.99


3) Q-Tips - $1.50


4) A piece of paper!

I got all of the items I needed from CVS (besides the piece of paper) and spent around $10.00 in total; however you may have these items laying around your house and you can do this project without spending any money! The brands of nail polish and make up I used are NYC.


Time to start!


Open your eyeshadow and begin scraping at (using a butter knife or some sort of sharp object) the color of your choice. Don't scrape all of the color out at once because it will be harder to pour onto the sheet of paper.


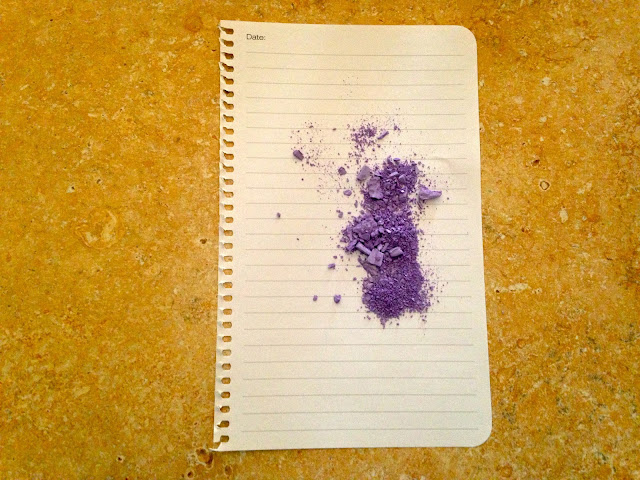
Pour what you've scraped onto the paper.


And this is what your eyeshadow should look like: 


Keep on scraping until you've emptied out the entire eyeshadow section of your choice and pour the excess eyeshadow onto the paper!


Once the eye shadow container is completely empty, make sure you crush the eyeshadow color down into powder because big chunks will not fit into the nail polish bottle.


Next, open up one of your clear nail polish bottles and pour a little of the nail polish into your trash can to make room for the powder. DO NOT pour the nail polish into your sink, it will clog your drain.


 Time to start pouring! With the lid off of the nail polish remover, fold the paper in half (with the eye shadow in it) to make the pour 10x easier.


If you get a little eyeshadow on the table it's perfectly fine because it's easy to wipe up and you could always brush it right back onto the paper to pour back into the bottle!


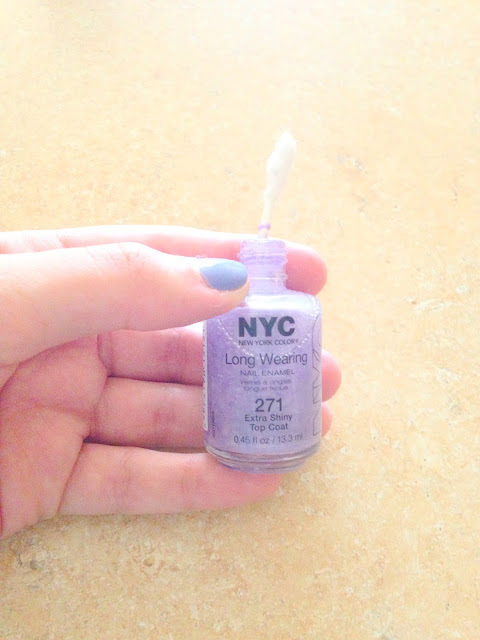
This is what your nail polish should look like after the pour.


Pretty cool, right? Take your Q-Tips and pull the cotton off one of the ends to use as a mixing tool to mix the eye shadow and clear nail polish.


Once the cotton is ripped off either side, begin mixing!


Mix it for about two minutes and you will see your final product!


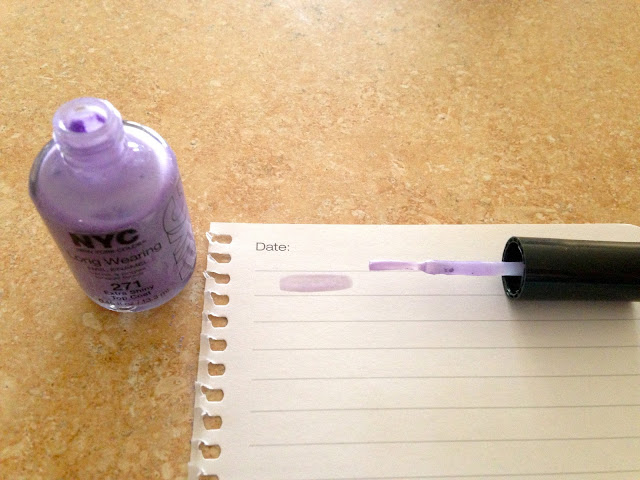
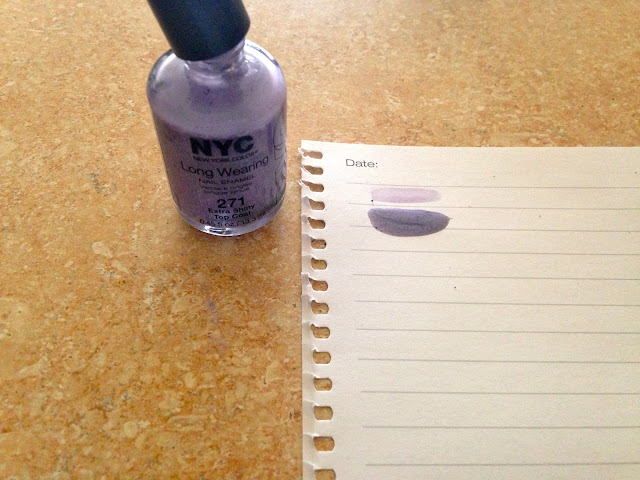
To ensure you're happy with the color, grab a piece of paper and test it out!


The color was definitely too light for my liking, so I followed the same steps as above and added some black eye shadow to darken it.


And here was my final product (in comparison to the first shade)! I was very very happy with it.


The most perfect purple color I could've asked for!

I also bought a second bottle of clear nail polish that could be used as a top coat or to make another color! You could always be bold and mix colors or choose very funky greens or blues. Adding darker colors will darken the shade as adding lighter ones will lighten it and possibly make it more transparent looking. This particular DIY only took me about 20 minutes and didn't require any heat or craft tools. Like I mentioned above, you could save yourself $10.00 and use eyeshadows and nail polishes you already have at home!

I really hope you enjoyed this weeks FRI"DIY" blog and I'm already looking forward to next weeks!


Links to the places/products mentioned above:
CVS: http://www.cvs.com
NYC Beauty: http://newyorkcolor.com


What do you think of this DIY? What colors are you planning on trying? If you do try this out, please send pictures!

Wednesday, July 31, 2013

Happy Hump Day!

It's finally the middle of the work week! Only two more days until the weekend and I know everyone's excited for that!! One of my favorite things to do during work whenever I get a free second is look at quotes on Pinterest, We Heart It and Tumblr! Over the past week I've accumulated some quotes that I really like and would like to share with you!

Monday, July 22, 2013

Birthday (On A Budget)!

My boyfriend Cody's birthday was on July 16, he turned the BIG 2-1!
Here's a picture of the big, bad 21 year old eating the BIRTHDAY BREAKFAST I cooked for him!..


It was definitely an exciting time for, not only him, but every member of his family and his friends as well! We threw a "Christmas in July" themed party which turned out GREAT. We even rented a Sno Cone machine that was in the shape of a polar bear. It couldn't have worked out better! Now, I originally intended to fill up this post with details of the AMAZING dinner we had last night at Carmine's in Atlantic City, New Jersey, (located in the Tropicana Casino) but I'll save that for the next post!

So, let's start off with the food! My mom owns a restaurant in Ventnor, New Jersey, Called Domenico's. Luckily, she catered the party which saved me a very big amount of money! I was so relieved that I could put some of the food funds toward the decorations.

Here's a picture of the way we had the food set up:


I also picked up some snack food from Sam's Club. If you do not have a Sam's Club Card, I highly suggest getting one! They sell large quantities of food at (almost) wholesale prices. It's a great way to shop because it allows you to buy things in bulk for a cheaper price than if you were to buy them individually! I picked up a huge box of Capri Sun juice, lemonade, chips, dip, hamburgers, hot dogs, hot dog buns, hamburger buns, lollipops, those red candy-cane looking mints that remind you of Christmas :) and I also picked up this really cool iced tea pitcher! In total I spent about $150 there which was great for the amount of stuff I got, especially because everything came in such large quantities!

Now, onto the biggest hit at the party, the Sno Kone machine! It cost around $60.00 to rent the machine and then when you arrive at the store you have the option to buy the Sno Kone Juice and cups for the ice to go into. All together I spent $75.00 renting the Sno Kone machine. I got three packs of cups, the Sno Kone machine and two different flavored juices. Everyone LOVED it and it was well worth the money! I rented it from AC Party Rental located on the Black Horse Pike in Egg Harbor Township, New jersey.

 Here's a picture of the Sno Cone machine and their website: http://acparty.com/


My friend, Brittney, was REALLY liking the polar bear head.. Can you tell?


However, the thing that made my night wasn't the Sno Cone machine, it was the fact that everyone really took the theme of the party serious and got all dressed up for it! We had a green, red and white dress code and it made me so happy to see that people cared enough to acknowledge the theme!

Here's a picture of one of my favorite outfits from the night!


All-in-all the party was a HUGE success. It [the party] got us all in the Christmas spirit! Here are some more pictures from our very own Christmas in July celebration!