Showing posts with label Ootd. Show all posts

Thursday, October 17, 2013

Urban Outfitters Opens Halloween Shop!

This is something I am SO extremely excited for that I can barley put it into words. Urban Outfitters added a "Halloween" section to their website and the merchandise listed in that section is AWESOME. I've been on the Halloween section of Urban at least 5 or 6 times this month and each time I look at it I get more and more excited for Halloween!

In case no costume really speaks to you this year, Urban has you covered! This online section is filled with low-price items that are perfect for last-minute costumes.

For $12 you can get a shark fin to top off your Sharknado costume, or for $40, ensure that you'll win best-dressed at your party with their sumo wrestler costume (which is inflatable)!


If dressing up isn’t really your thing, but you still want to be festive, the shop also features fun graphic tees—think: cats, pumpkins, and skeletons—that are perfect to wear to any Halloween party!


Besides the amazing accessories and dinosaur onesies, the best part about the shop’s is its tagline—“Costumes, makeup and everything you need to creep it real…”

Check it out!


Friday, August 30, 2013

FRI"DIY - Illuminating Candle Holder

Good afternoon and happy Friday! I know everyone is in a great mood today because, who doesn't love Friday? The reason I do is because I get to blog about DIY projects which happen to be one of my favorite down time hobbies. Today's DIY is very quick and easy but awesome! Anyone who knows me, knows I love candles; especially fall scented ones :-). Which is why you'll probably be seeing a lot of candle-based DIYs on my blog. Anywho, this blog is really simple and fun, only took about 15-20 minutes and I can show you in three short steps!


What you'll need:

A candle holder (of your choice) I purchased this one from The Christmas Tree Shops - $4.00

A glue gun, I purchased this one from A.C Moore and it was around $3.99. I would also grab extra glue sticks, too!

Mosaic Stones, I purchased the mini bags above from The Christmas Tree Shoppes, they were $1.99 each. I didn't need as many stones as I bought, I just figured it's better to buy more and have some left over than to be short stones. You can choose whichever colors you want *HOWEVER* they must be transparent (see through) or the light will not shine through them. I chose red, orange, yellow and clear because they're fall colors and I love fall!

Time to start!

Monday, August 19, 2013

Summer Sales!

The end of summer is the beginning of some great sales! I've been browsing the internet all weekend in search of the cutest items of clothing for the best prices possible! I know you're wondering, "Why would I want to buy summer clothes if fall is coming?" and I have the answer for you! Because most summer clothes can be transitioned into the fall season, since fall isn't as cold as winter. Fall serves as a medium between winter and summer and has a mild temperature; therefore, you can wear the new clothing you've purchased from the summer sales throughout fall. Also, why not stock up on some clothes for next spring/summer? It will be here before you know it! And imagine how exciting it would be to know you have a bunch of new clothes waiting to be worn! Definitely something to look forward to.

Let's start shopping!

Aeropostale "Sheer Cropped Crochet Tank" - $39.50 ON SALE $7.99

Friday, August 16, 2013

FRI"DIY" - Tassel Necklaces (On A Budget)

Hello and happy Friday! I always get really excited for Fridays, not only because it's the weekend, but because it means I get to try out a new DIY! This weeks DIY is one of my favorites. I've been dying for a tassel necklace for fall! They're adorable and match with mostly everything. They're definitely funky, new and something I'm willing to try out!

If you haven't seen tassel necklaces yet, here are some I found online at Anthropologie:

Anthropologie "Neon Plume Necklace" - $38.00

Anthropologie "Tassel Plume Necklace" - $38.00

Anthropologie's website has a bunch of tassel necklaces and they range in price from $38-500+.

I loved their tassel necklaces so much that I decided I wanted to make my own.. On a budget! I got all of my products from AC Moore and it was one of the most simple DIY's I've done! Let's get started on your trendy tassel necklace.


The cost of this DIY is completely up to you and how many necklaces you want to make. I knew I would want to make more than one so I picked up a few extra items.


Tassels - $1.99 ea.

Jars of beads - $2.99 ea.

Beading wire - $3.99 ea.

Mini Diagonal Cutter - $2.99 ea.


Wednesday, August 14, 2013

Fall's Hottest Trend: Baroque (On A Budget)

Good morning! It's Wednesday, already, which means Friday is just around the corner! I had such a hard time sleeping last night, so, I decided I would do some online shopping and came across a new trend that I'm loving: Baroque.


Baroque is taking the fall runways by storm. Baroque patterns on pieces of clothing actually originated from pieces of art. The [Baroque] style of art was described as an exaggerated motion and clear, easily interpreted detail to produce drama and tension. The main goal of Baroque is for the observer to easily notice the bold Baroque pattern; they want the arrangement to stand out. A lot of celebrities are taking part in the Baroque trend, too!


Although Baroque doesn't particularly have to ONLY be printed in black and gold, see how prominent the gold pattern is on Selena Gomez's dress? It's the first thing your eyes get drawn to. The neutral black color on the base of the dress allows the gold Baroque pattern to really pop! It's such a classy and elegant look! The pattern is so interesting; it makes you want to examine the whole dress and see if the pattern gets more interesting than it already is.

Here are some other celebs rocking Baroque:


Lea Seydoux wore a white Baroque dress with blue embroidery.


Zoe Saldana, on the cover of Harper's Bazzar, in a black and gold Baroque romper


Hayden Panettiere in a pair of Baroque Joe's Jeans

Thursday, August 8, 2013

Back to School Bags! (On A Budget)

Good morning! It's been raining non-stop in New Jersey but it looks like it may clear up today! I hope it does because I really have to start squeezing in those beach days before school starts again! Although I love the summer and the beach, I really enjoy school, too. I love getting dressed for class, meeting new friends and professors and learning things that broaden your knowledge beyond belief. Think about it, each little thing, or topic, that you learn something about is one more thing that you know. If you pay very close attention in every class, you will be filled with so much knowledge that you won't know what to do with it! Every year before school starts, I go shopping for a "School Bag;" which is a bag I could use for some of the semester and one I can cram all of the stuff I need to use for class in. These days, most people just carry a handbag and call it quits because they think backpacks aren't the most stylish things; however I'm going to show you some greatly priced bags that can accommodate your love for fashion as well as those troublesome textbooks!

 Joyce Leslie "Into the Wild Fringe Tote" - Originally $19.99 ON SALE: $10.00
Fringe is great for the fall! As well as the black color with golden accents.

Joyce Leslie "Day in the City Spiked Mint Tote" - Originally $19.99 ON SALE: $10.00
Mint is the most popular color this season and so are the spiked appliques on this fashionable tote!

Wet Seal "Geek Canvas Tote" - $9.90
Steal Hayley Willams' style with this adorable geek tote bag!

Tuesday, August 6, 2013

Graphic Tee Tuesday (On A Budget)

Hello and thanks for stopping by! I have discovered a new obsession of mine that seems to increase daily: graphic tees. My favorite kind of graphic tees tend to be the ones with quotes printed on them. I mean, what's not to love about tees? They're extremely comfy and versatile. You can wear them lounging around the house, at the gym, or even at a casual event. If I could live in t-shirts I would and the fact that they have ones with pictures and eye catching quotes just increases my interest more and more!

Some graphic tees can run high in price. One of my favorite designers, Jac Vanek, has the most AMAZING graphic tees; however the price tag can be a little high but, sometimes it's worth it.

If you feel like splurging.. listed below are my favorite Jac Vanek graphic tees and their prices!


The "Your Blog" half tee - $49.00


"Sorry for Being Perfect" half tee - $49.00


"Pizza Boyfriend" tee - $64.00

Aren't they adorable? If you're interested in purchasing one of the t-shirts above, just click on the title of each t-shirt and it will lead you to the tee's page. Also, Jac has her tumblr blog located on the home page. She's awesome and her blog is, too.

If you're looking for some moderately priced graphic tee's we can move on to another one of my favorite designers - Brandy Melville


The "Stay Weird" tank - $18.00

This has also been seen on T.V star Lucy Hale from the hit show Pretty Little Liars!


Here's the t-shirt pictured on Lucy's official instagram - @LucyHale

Friday, August 2, 2013

FRI"DIY" - Make Your Own Nail Polish!

The weekend is finally here! I bet everyone is really excited for that.  Not only am I excited about the weekend, I'm excited for today's "DIY" blog post! Let me start by saying that in yesterday's post I accidentally wrote I was 250 views away from 2,000 in stead of 3,000, which I didn't notice until 5 hours after the blog was posted and it bummed me out. However, I reached over 3,000 views last night which definitely improved my mood! Anyway, today we are going to make our own nail polish! The only thing I love more than nail polish is DIYs, so being able to combine my love for the two started my day off on the right foot. It was one of the easiest projects I have done and it was very inexpensive! Let's get started!

What you'll need for this DIY:


In no specific order:


1) 1-2 bottles of clear nail polish - 99 cents each.


2) Eyeshadow pallet of your choice (you could also use an old one of yours) - $4.99


3) Q-Tips - $1.50


4) A piece of paper!

I got all of the items I needed from CVS (besides the piece of paper) and spent around $10.00 in total; however you may have these items laying around your house and you can do this project without spending any money! The brands of nail polish and make up I used are NYC.


Time to start!


Open your eyeshadow and begin scraping at (using a butter knife or some sort of sharp object) the color of your choice. Don't scrape all of the color out at once because it will be harder to pour onto the sheet of paper.


Pour what you've scraped onto the paper.


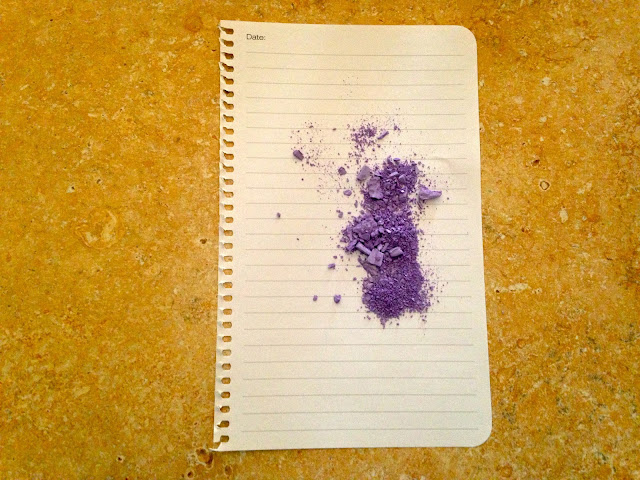
And this is what your eyeshadow should look like: 


Keep on scraping until you've emptied out the entire eyeshadow section of your choice and pour the excess eyeshadow onto the paper!


Once the eye shadow container is completely empty, make sure you crush the eyeshadow color down into powder because big chunks will not fit into the nail polish bottle.


Next, open up one of your clear nail polish bottles and pour a little of the nail polish into your trash can to make room for the powder. DO NOT pour the nail polish into your sink, it will clog your drain.


 Time to start pouring! With the lid off of the nail polish remover, fold the paper in half (with the eye shadow in it) to make the pour 10x easier.


If you get a little eyeshadow on the table it's perfectly fine because it's easy to wipe up and you could always brush it right back onto the paper to pour back into the bottle!


This is what your nail polish should look like after the pour.


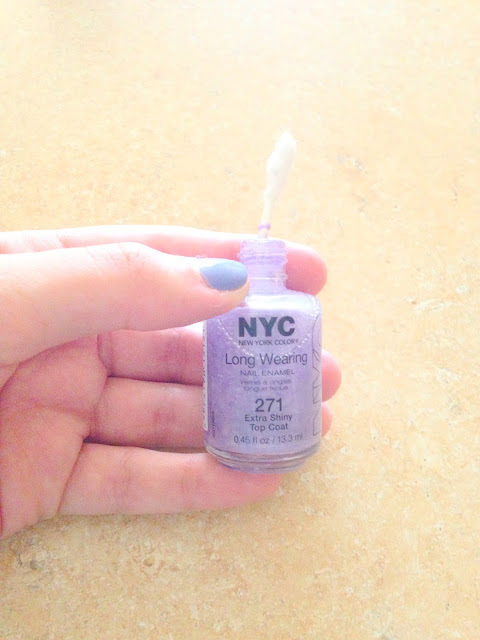
Pretty cool, right? Take your Q-Tips and pull the cotton off one of the ends to use as a mixing tool to mix the eye shadow and clear nail polish.


Once the cotton is ripped off either side, begin mixing!


Mix it for about two minutes and you will see your final product!


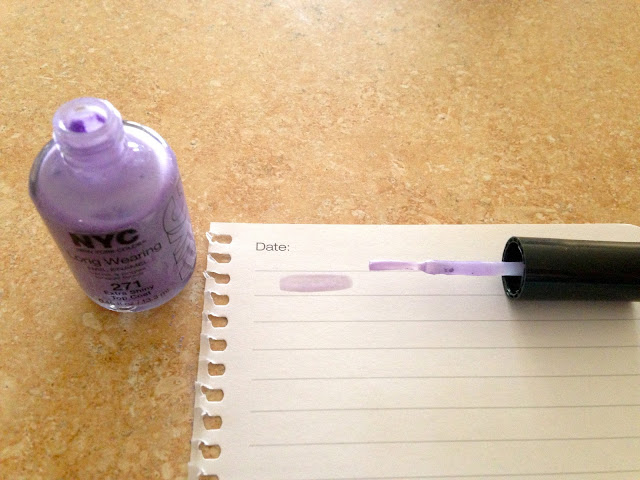
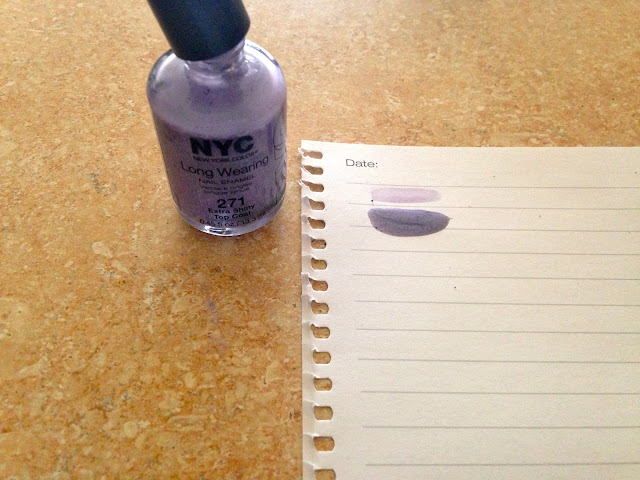
To ensure you're happy with the color, grab a piece of paper and test it out!


The color was definitely too light for my liking, so I followed the same steps as above and added some black eye shadow to darken it.


And here was my final product (in comparison to the first shade)! I was very very happy with it.


The most perfect purple color I could've asked for!

I also bought a second bottle of clear nail polish that could be used as a top coat or to make another color! You could always be bold and mix colors or choose very funky greens or blues. Adding darker colors will darken the shade as adding lighter ones will lighten it and possibly make it more transparent looking. This particular DIY only took me about 20 minutes and didn't require any heat or craft tools. Like I mentioned above, you could save yourself $10.00 and use eyeshadows and nail polishes you already have at home!

I really hope you enjoyed this weeks FRI"DIY" blog and I'm already looking forward to next weeks!


Links to the places/products mentioned above:
CVS: http://www.cvs.com
NYC Beauty: http://newyorkcolor.com


What do you think of this DIY? What colors are you planning on trying? If you do try this out, please send pictures!