
A few days ago, I got asked to write a blog on college essentials and advise for incoming freshman; which is such a great idea! Why didn't I think of that?
I decided that I would start with the advise part of the blog since it would consist of a lot of writing.
I had a ton of questions that I wish I would've asked before leaving for college and I faced a lot of things that I wasn't prepared for. I'm not going to lie, I was TERRIFIED to start college. I was also a little frustrated because I was already a freshman in high school and now I had to start all over as a freshman again; however, college is very different than high school. For example, you're living on your own, completely on your own. You will have to cook, clean and decide when you want to do your homework and study because there will not be anyone breathing down your neck telling you to do those things.
Starting with food, I would definitely learn some quick recipes that you can whip together before or after class. When I was going away to school I didn't even think about cooking, it didn't cross my mind, I just figured I would eat whatever I could find and whatever was quick; which is something you DO NOT want to do. Take a day to sit with your parents, or Google some easy recipes, and learn learn learn. You will ruin your body if you do not eat healthy. You will gain weight and all of the unhealthy food will run your body down and make you extremely tired; which isn't good because you need all the energy you can get in college!
Another important thing
Showing posts with label explore. Show all posts
Showing posts with label explore. Show all posts
Tuesday, August 20, 2013
Sunday, August 4, 2013
Give A Little Love.. "Mini Post"
Good afternoon! I woke up about an hour and a half ago and I just can't bring myself to get out of bed. Probably because today is Sunday and I always feel like snuggling in on Sundays, however, I have a birthday party to go to tonight so I need to get myself up and dressed to go pick out an outfit! Well, the previous sentences have absolutely nothing to do with today's blog post but they're still relevant to how relaxing Sundays tend to be. For this Sunday's "mini post" I found an amazing video on YouTube that definitely showed me life in a new perspective and I couldn't help it.. I HAVE to post it and share it with everyone:
Labels:
celebrity,
explore,
facebook,
friends,
gossip,
inspiration,
inspirational,
interesting,
photography,
phrase,
popular,
quote,
trend

Friday, August 2, 2013
FRI"DIY" - Make Your Own Nail Polish!
The weekend is finally here! I bet everyone is really excited for that. Not only am I excited about the weekend, I'm excited for today's "DIY" blog post! Let me start by saying that in yesterday's post I accidentally wrote I was 250 views away from 2,000 in stead of 3,000, which I didn't notice until 5 hours after the blog was posted and it bummed me out. However, I reached over 3,000 views last night which definitely improved my mood! Anyway, today we are going to make our own nail polish! The only thing I love more than nail polish is DIYs, so being able to combine my love for the two started my day off on the right foot. It was one of the easiest projects I have done and it was very inexpensive! Let's get started!
What you'll need for this DIY:

In no specific order:

1) 1-2 bottles of clear nail polish - 99 cents each.

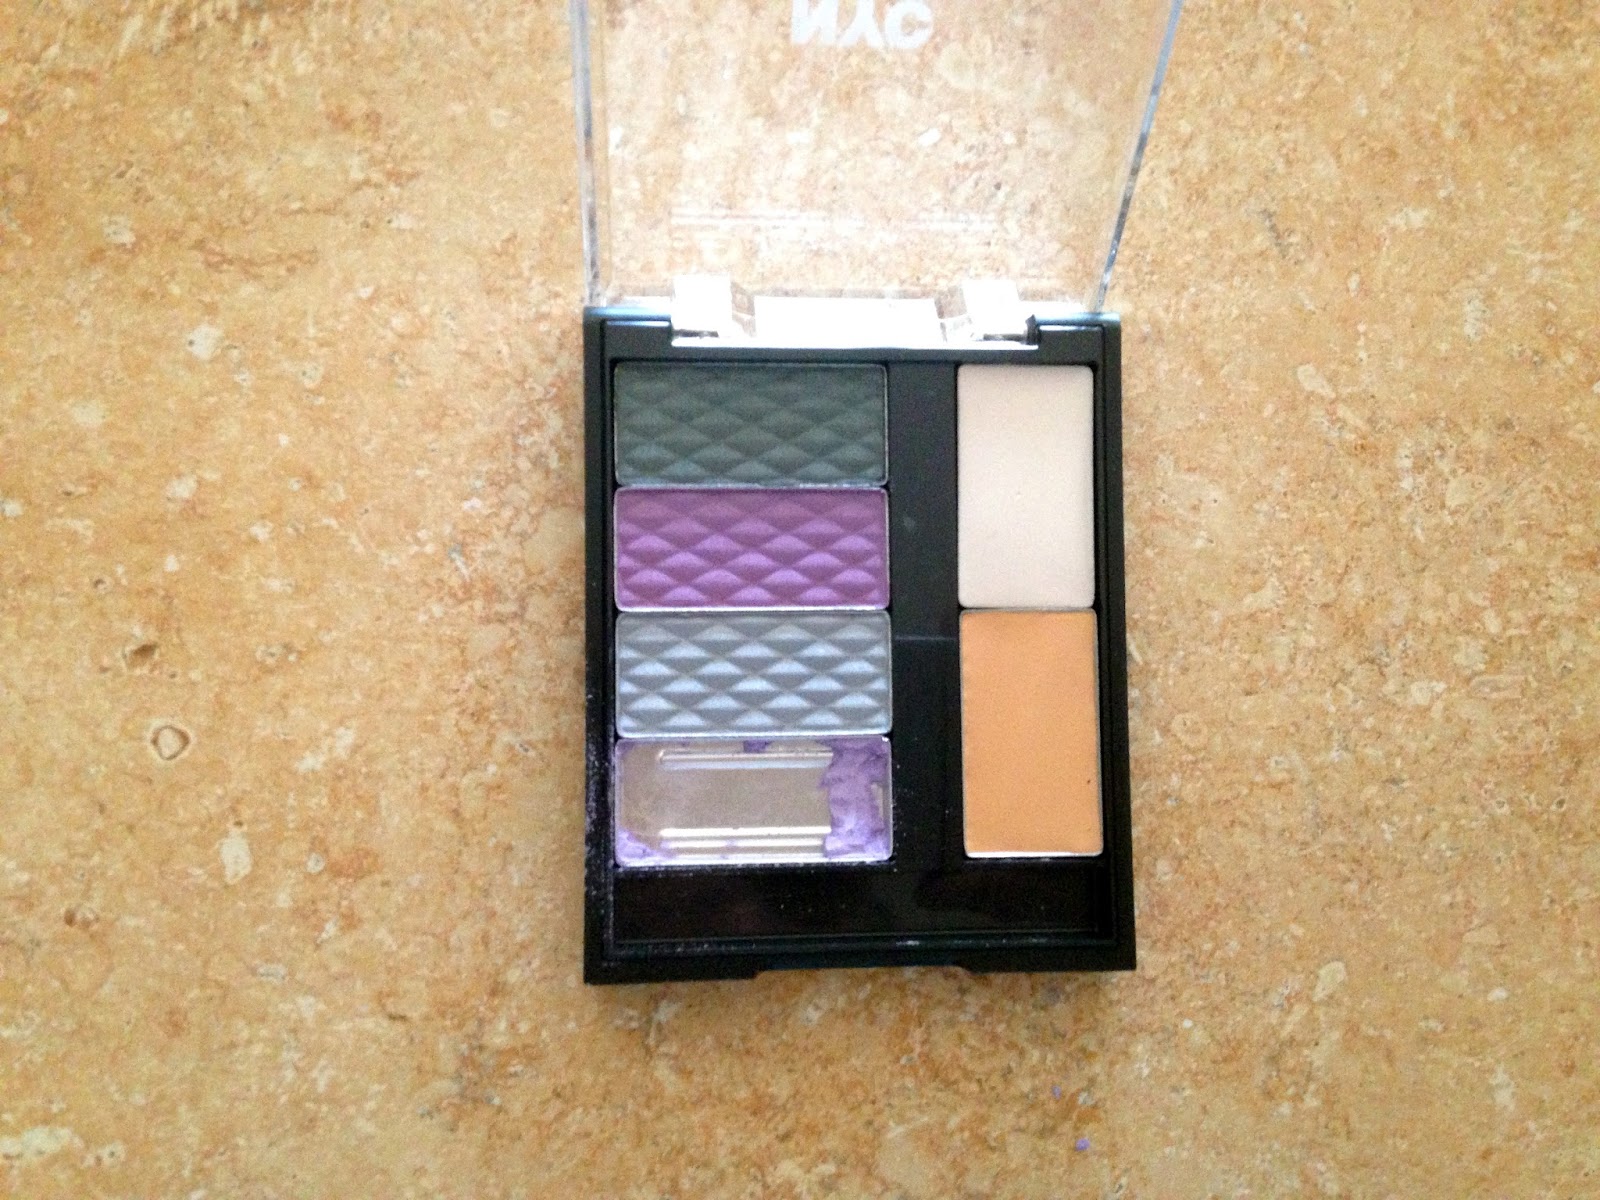
2) Eyeshadow pallet of your choice (you could also use an old one of yours) - $4.99

3) Q-Tips - $1.50

4) A piece of paper!
Time to start!
Open your eyeshadow and begin scraping at (using a butter knife or some sort of sharp object) the color of your choice. Don't scrape all of the color out at once because it will be harder to pour onto the sheet of paper.


Pour what you've scraped onto the paper.

And this is what your eyeshadow should look like:

Keep on scraping until you've emptied out the entire eyeshadow section of your choice and pour the excess eyeshadow onto the paper!


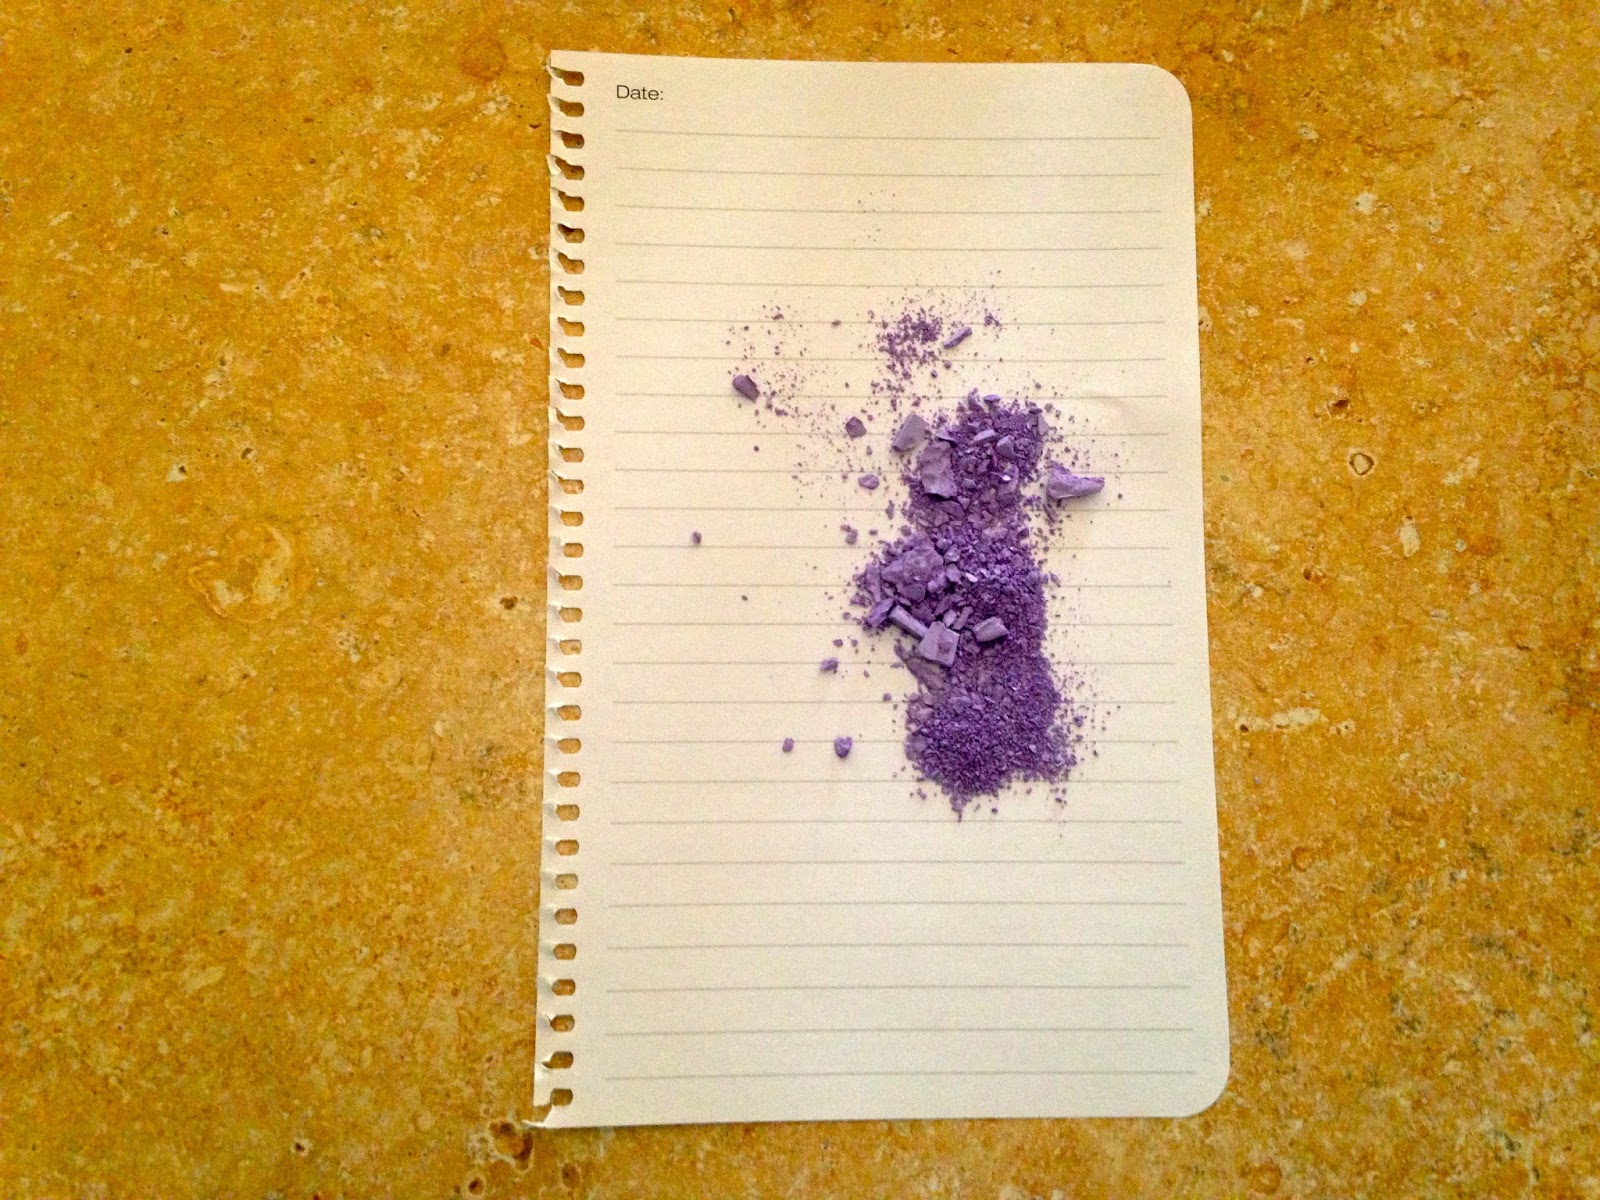
Once the eye shadow container is completely empty, make sure you crush the eyeshadow color down into powder because big chunks will not fit into the nail polish bottle.

Next, open up one of your clear nail polish bottles and pour a little of the nail polish into your trash can to make room for the powder. DO NOT pour the nail polish into your sink, it will clog your drain.


Time to start pouring! With the lid off of the nail polish remover, fold the paper in half (with the eye shadow in it) to make the pour 10x easier.

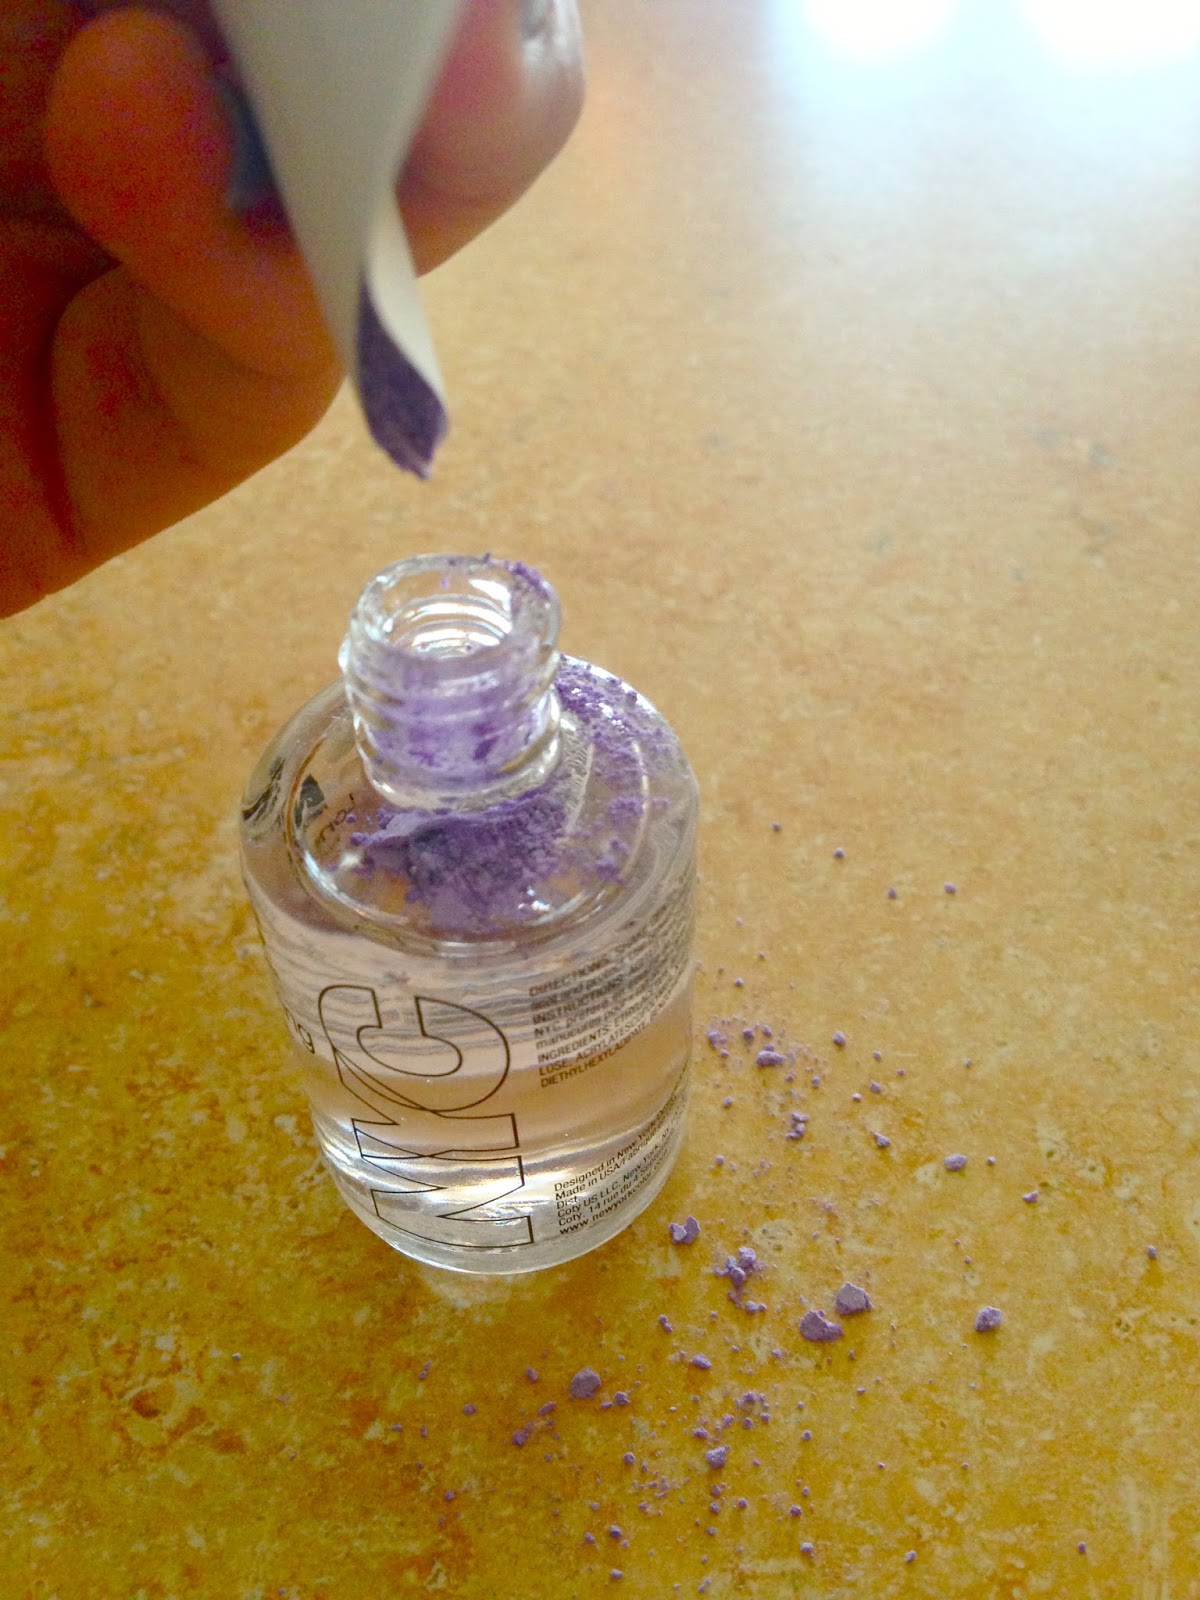
If you get a little eyeshadow on the table it's perfectly fine because it's easy to wipe up and you could always brush it right back onto the paper to pour back into the bottle!

This is what your nail polish should look like after the pour.


Pretty cool, right? Take your Q-Tips and pull the cotton off one of the ends to use as a mixing tool to mix the eye shadow and clear nail polish.


Once the cotton is ripped off either side, begin mixing!


Mix it for about two minutes and you will see your final product!

To ensure you're happy with the color, grab a piece of paper and test it out!


The color was definitely too light for my liking, so I followed the same steps as above and added some black eye shadow to darken it.

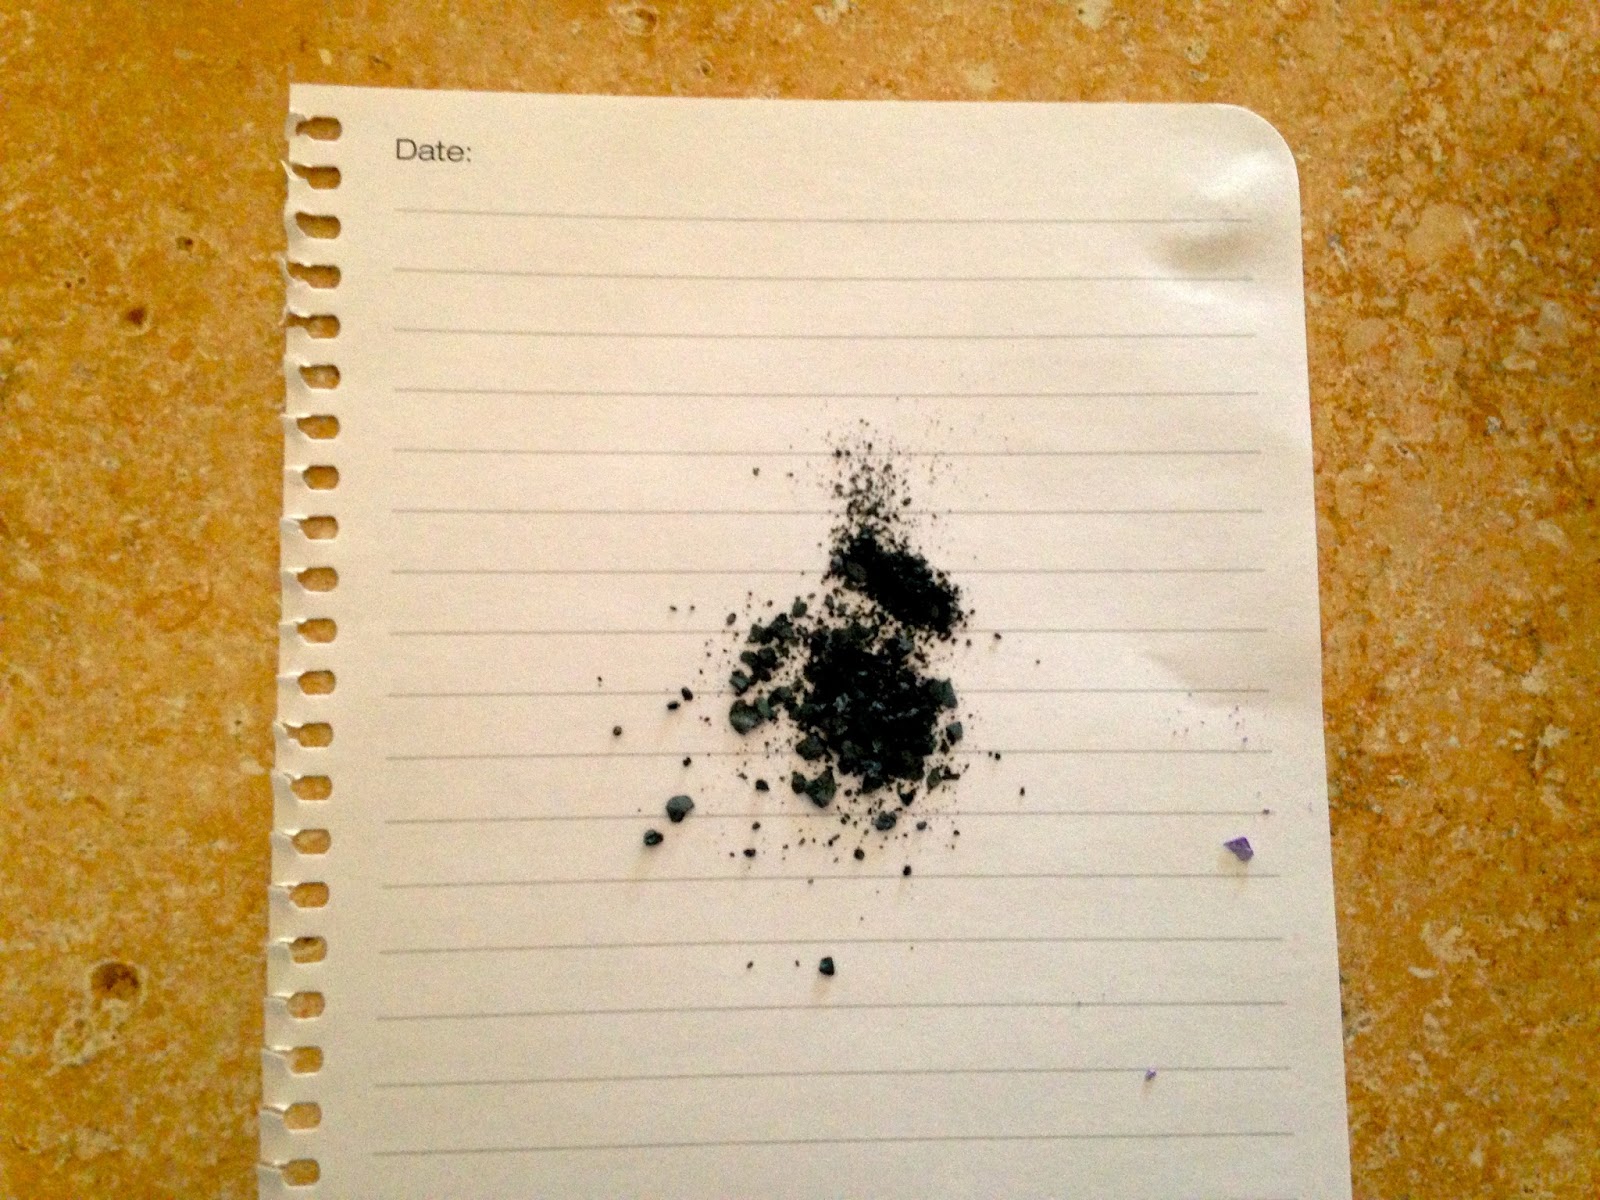
And here was my final product (in comparison to the first shade)! I was very very happy with it.

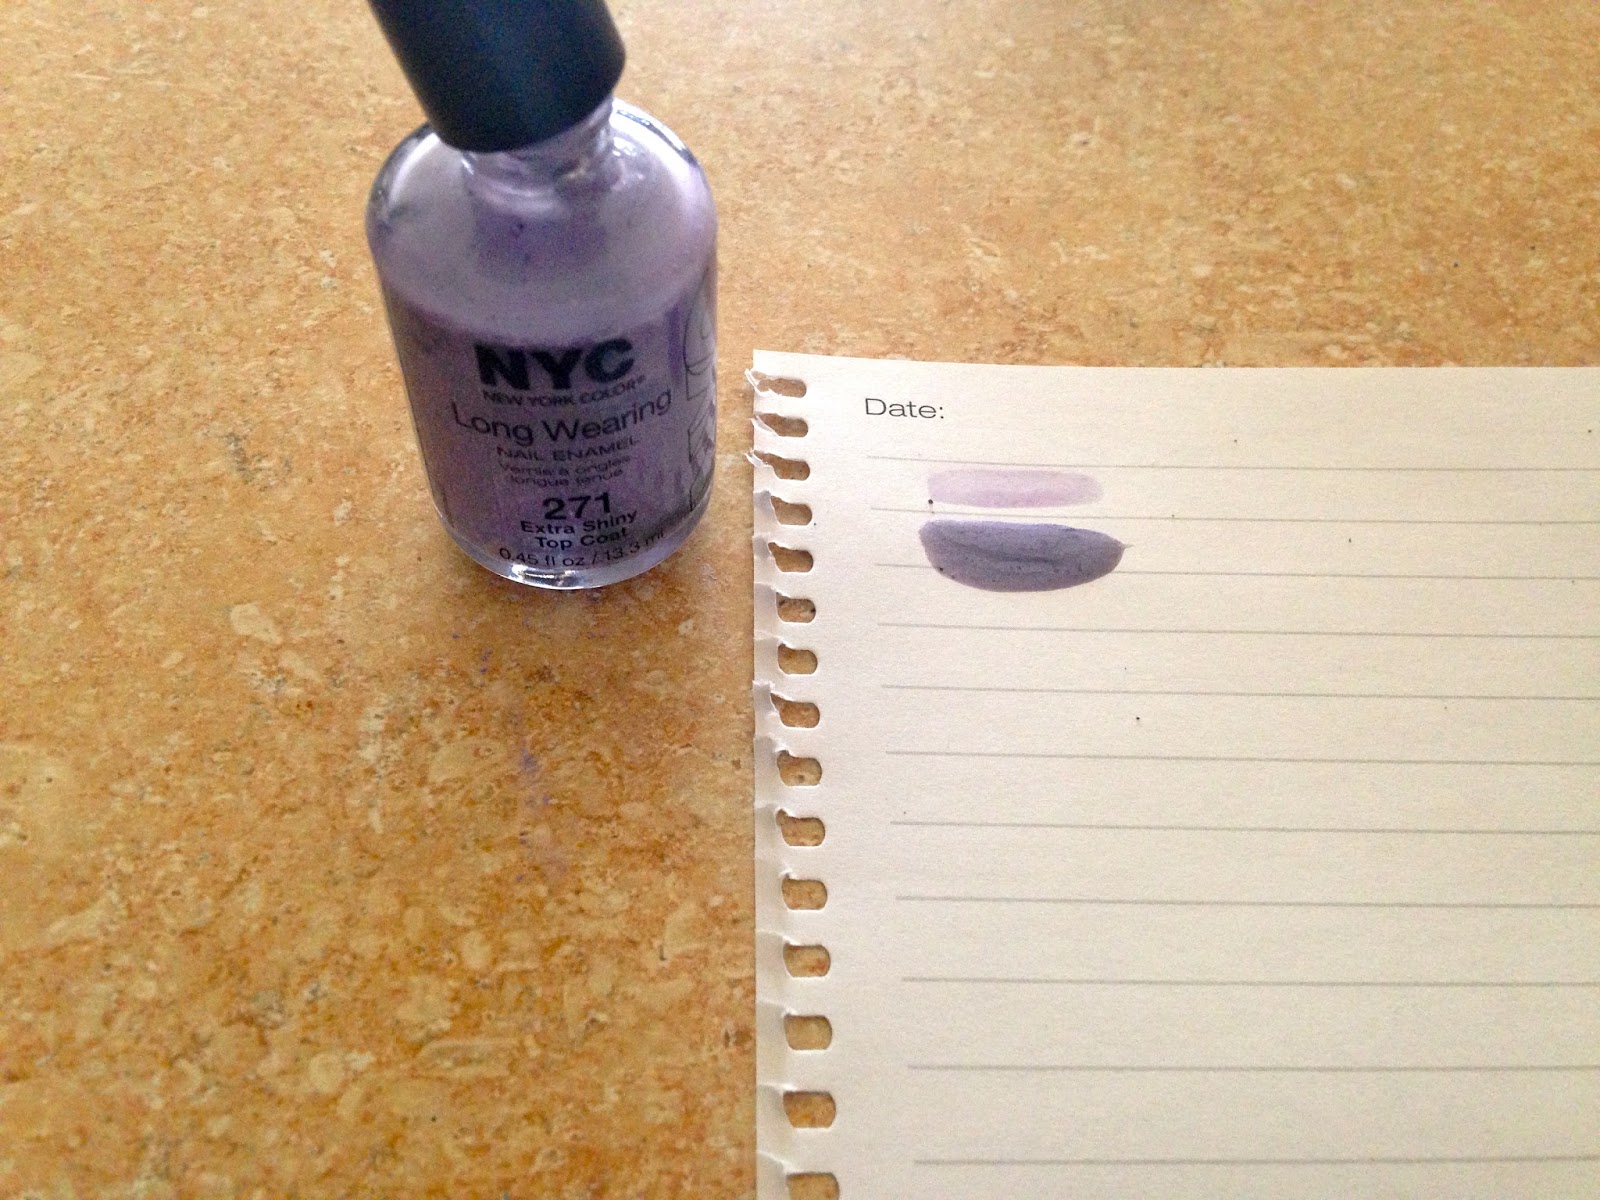
The most perfect purple color I could've asked for!
I also bought a second bottle of clear nail polish that could be used as a top coat or to make another color! You could always be bold and mix colors or choose very funky greens or blues. Adding darker colors will darken the shade as adding lighter ones will lighten it and possibly make it more transparent looking. This particular DIY only took me about 20 minutes and didn't require any heat or craft tools. Like I mentioned above, you could save yourself $10.00 and use eyeshadows and nail polishes you already have at home!
I really hope you enjoyed this weeks FRI"DIY" blog and I'm already looking forward to next weeks!
Links to the places/products mentioned above:
CVS: http://www.cvs.com
NYC Beauty: http://newyorkcolor.com
What do you think of this DIY? What colors are you planning on trying? If you do try this out, please send pictures!
Wednesday, July 31, 2013
Happy Hump Day!
It's finally the middle of the work week! Only two more days until the weekend and I know everyone's excited for that!! One of my favorite things to do during work whenever I get a free second is look at quotes on Pinterest, We Heart It and Tumblr! Over the past week I've accumulated some quotes that I really like and would like to share with you!


Tuesday, July 30, 2013
My Day in Delaware (On A Budget)!
I am so excited to write this blog post about my day in Delaware yesterday! If you didn't read yesterdays blog post, Cody and I decided to go to Ocean City, MD because we finally had a day off together! Also, it was like an early anniversary date. I had so much fun and I've been looking forward to sharing what I did and how much we spent in total with you! So, lets get started!
We woke up around 9 am to catch the Cape May Ferry (located in Cape May, NJ) which was going to Lewes, DE. It took the jaws of life to get me out of bed because I was so tired but eventually I got out and got dressed! We stopped at WaWa to grab some morning coffee, or in my case a French Vanilla Cappuccino, and headed toward the ferry!

We intended on getting on the 10:30 am ferry so that we would make it to Ocean City, MD, with plenty of time to enjoy ourselves. However, when we got to the ticket booth to buy tickets for the ferry, the woman told us that the 10:30 ferry was full; which meant we had to take the 12:00 one! We were so upset but she told us that sometimes if there's room we may be able to fit on the 10:30 one! Annnnnnnnnnnd.. luckily, there was room! We were the last car in our lane able to fit onto the ferry!


If you haven't been on a ferry before, it's a HUGE boat that you drive your car onto! It drives through the water (obviously) from one location to another, cutting the travel time in half. It makes it really easy for commuters because it's a shorter distance and if they commute back and forth from work everyday, they don't have to worry about being exhausted and falling asleep behind the wheel! The round trip price for the ferry was $80; that included the car, Cody and me. The $80 is definitely worth it when you think of how much you would've spent in gas driving there. Each ferry is different but they're HUGE usually 2-3 floors and very spacious. There's a great view, mini food court, arcade, TVs and everything else you could possibly ask for during your mini travel period.


Birds always seem to follow the boat and sometimes you can even see dolphins!

Cody was having a lot of fun! We were loving the breeze coming off the water and we were still a little tired so it was keeping us awake! The morning was over-cast which was making us worried about the possibility of rain during our mini vacation. After about an hour and fifteen-ish minutes, we finally got to Delaware! And there was absolutely no traffic getting off of the ferry; it was very well ran. We had a 45 minute drive to OC, MD but we were excited to see cool stuff along the way!


We woke up around 9 am to catch the Cape May Ferry (located in Cape May, NJ) which was going to Lewes, DE. It took the jaws of life to get me out of bed because I was so tired but eventually I got out and got dressed! We stopped at WaWa to grab some morning coffee, or in my case a French Vanilla Cappuccino, and headed toward the ferry!

We intended on getting on the 10:30 am ferry so that we would make it to Ocean City, MD, with plenty of time to enjoy ourselves. However, when we got to the ticket booth to buy tickets for the ferry, the woman told us that the 10:30 ferry was full; which meant we had to take the 12:00 one! We were so upset but she told us that sometimes if there's room we may be able to fit on the 10:30 one! Annnnnnnnnnnd.. luckily, there was room! We were the last car in our lane able to fit onto the ferry!


If you haven't been on a ferry before, it's a HUGE boat that you drive your car onto! It drives through the water (obviously) from one location to another, cutting the travel time in half. It makes it really easy for commuters because it's a shorter distance and if they commute back and forth from work everyday, they don't have to worry about being exhausted and falling asleep behind the wheel! The round trip price for the ferry was $80; that included the car, Cody and me. The $80 is definitely worth it when you think of how much you would've spent in gas driving there. Each ferry is different but they're HUGE usually 2-3 floors and very spacious. There's a great view, mini food court, arcade, TVs and everything else you could possibly ask for during your mini travel period.
Here are some pictures of the view:


Birds always seem to follow the boat and sometimes you can even see dolphins!

Cody was having a lot of fun! We were loving the breeze coming off the water and we were still a little tired so it was keeping us awake! The morning was over-cast which was making us worried about the possibility of rain during our mini vacation. After about an hour and fifteen-ish minutes, we finally got to Delaware! And there was absolutely no traffic getting off of the ferry; it was very well ran. We had a 45 minute drive to OC, MD but we were excited to see cool stuff along the way!
Like this bridge for example:


Sunday, July 21, 2013
Welcome!

Welcome to my brand new blog and thank you for reading my very first blog post! I'm still getting used to this, so try and bear with me while I learn the ways of the blogging world! If you would like to know some background on me you can click on the "About Me" tab! I also have a tab that will lead you to my online thrift store, so click away and explore! I look forward to discussing my day-to-day thoughts, savings and experiences with everyone!
Don't forget to subscribe and follow me on twitter and instagram! @BriMazzuca


Subscribe to:
Posts (Atom)


