Showing posts with label facebook. Show all posts

Thursday, August 22, 2013

Three Awesome Videos That'll Help You Get Through Thursday

Good morning!  For today's "mini post" I was doing my daily scroll through Cosmopolitan's website, which I do every morning, and I came across a post called "Three Awesome Videos That'll Help You Get You Get Through the Rest of the Week" Those videos definitely improved my morning, which prompted me to search the web for my own awesome videos to blog about!

Check them out below!

One video I found is "16 of the Worst Feelings" and this video will definitely improve your mood since (hopefully) none of these things have happened to you so far today. Remember, things could always be worse!


This video is "9 Celebrity Facts that Might Explode Your Brain"


Sunday, August 4, 2013

Give A Little Love.. "Mini Post"

Good afternoon! I woke up about an hour and a half ago and I just can't bring myself to get out of bed. Probably because today is Sunday and I always feel like snuggling in on Sundays, however, I have a birthday party to go to tonight so I need to get myself up and dressed to go pick out an outfit! Well, the previous sentences have absolutely nothing to do with today's blog post but they're still relevant to how relaxing Sundays tend to be. For this Sunday's "mini post" I found an amazing video on YouTube that definitely showed me life in a new perspective and I couldn't help it.. I HAVE to post it and share it with everyone:

Friday, August 2, 2013

FRI"DIY" - Make Your Own Nail Polish!

The weekend is finally here! I bet everyone is really excited for that.  Not only am I excited about the weekend, I'm excited for today's "DIY" blog post! Let me start by saying that in yesterday's post I accidentally wrote I was 250 views away from 2,000 in stead of 3,000, which I didn't notice until 5 hours after the blog was posted and it bummed me out. However, I reached over 3,000 views last night which definitely improved my mood! Anyway, today we are going to make our own nail polish! The only thing I love more than nail polish is DIYs, so being able to combine my love for the two started my day off on the right foot. It was one of the easiest projects I have done and it was very inexpensive! Let's get started!

What you'll need for this DIY:


In no specific order:


1) 1-2 bottles of clear nail polish - 99 cents each.


2) Eyeshadow pallet of your choice (you could also use an old one of yours) - $4.99


3) Q-Tips - $1.50


4) A piece of paper!

I got all of the items I needed from CVS (besides the piece of paper) and spent around $10.00 in total; however you may have these items laying around your house and you can do this project without spending any money! The brands of nail polish and make up I used are NYC.


Time to start!


Open your eyeshadow and begin scraping at (using a butter knife or some sort of sharp object) the color of your choice. Don't scrape all of the color out at once because it will be harder to pour onto the sheet of paper.


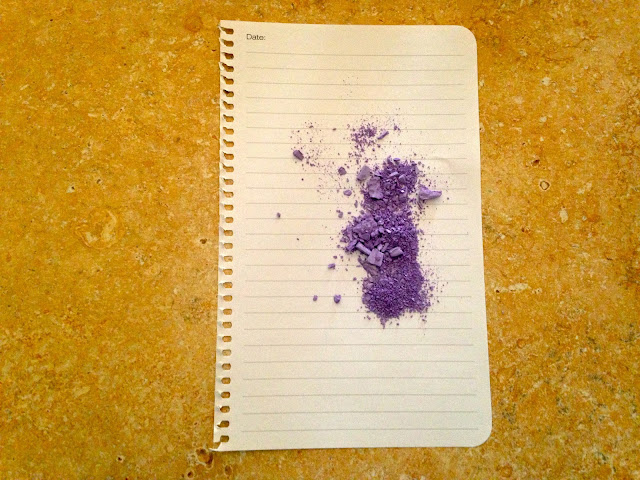
Pour what you've scraped onto the paper.


And this is what your eyeshadow should look like: 


Keep on scraping until you've emptied out the entire eyeshadow section of your choice and pour the excess eyeshadow onto the paper!


Once the eye shadow container is completely empty, make sure you crush the eyeshadow color down into powder because big chunks will not fit into the nail polish bottle.


Next, open up one of your clear nail polish bottles and pour a little of the nail polish into your trash can to make room for the powder. DO NOT pour the nail polish into your sink, it will clog your drain.


 Time to start pouring! With the lid off of the nail polish remover, fold the paper in half (with the eye shadow in it) to make the pour 10x easier.


If you get a little eyeshadow on the table it's perfectly fine because it's easy to wipe up and you could always brush it right back onto the paper to pour back into the bottle!


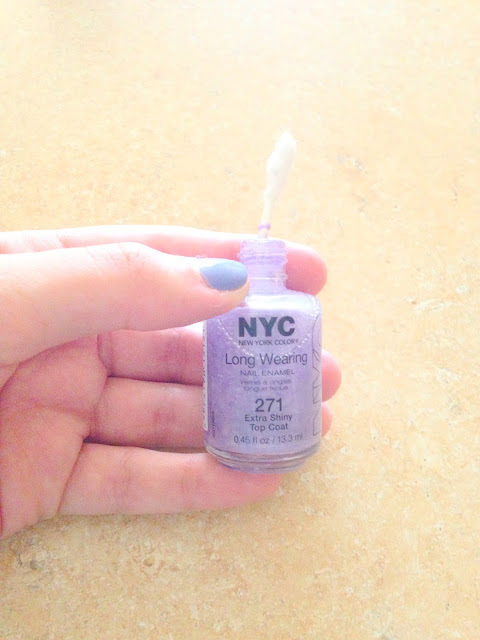
This is what your nail polish should look like after the pour.


Pretty cool, right? Take your Q-Tips and pull the cotton off one of the ends to use as a mixing tool to mix the eye shadow and clear nail polish.


Once the cotton is ripped off either side, begin mixing!


Mix it for about two minutes and you will see your final product!


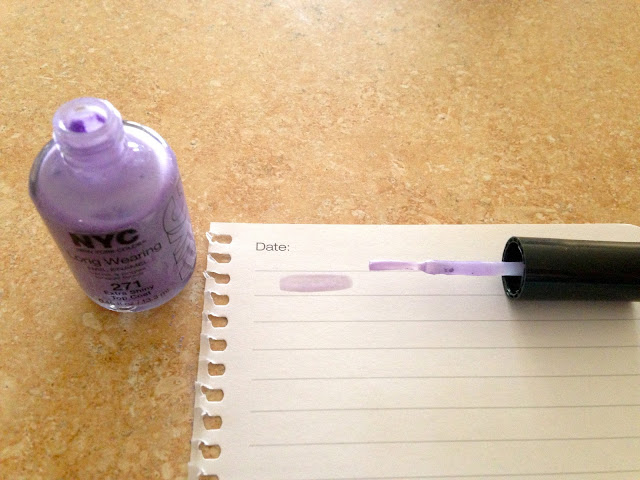
To ensure you're happy with the color, grab a piece of paper and test it out!


The color was definitely too light for my liking, so I followed the same steps as above and added some black eye shadow to darken it.


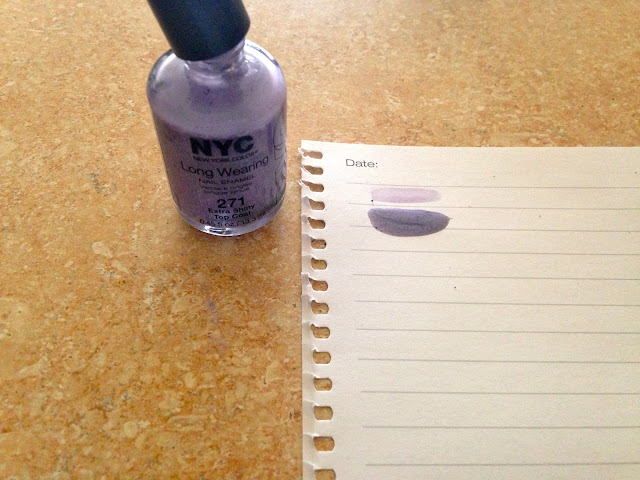
And here was my final product (in comparison to the first shade)! I was very very happy with it.


The most perfect purple color I could've asked for!

I also bought a second bottle of clear nail polish that could be used as a top coat or to make another color! You could always be bold and mix colors or choose very funky greens or blues. Adding darker colors will darken the shade as adding lighter ones will lighten it and possibly make it more transparent looking. This particular DIY only took me about 20 minutes and didn't require any heat or craft tools. Like I mentioned above, you could save yourself $10.00 and use eyeshadows and nail polishes you already have at home!

I really hope you enjoyed this weeks FRI"DIY" blog and I'm already looking forward to next weeks!


Links to the places/products mentioned above:
CVS: http://www.cvs.com
NYC Beauty: http://newyorkcolor.com


What do you think of this DIY? What colors are you planning on trying? If you do try this out, please send pictures!

Wednesday, July 31, 2013

Happy Hump Day!

It's finally the middle of the work week! Only two more days until the weekend and I know everyone's excited for that!! One of my favorite things to do during work whenever I get a free second is look at quotes on Pinterest, We Heart It and Tumblr! Over the past week I've accumulated some quotes that I really like and would like to share with you!

Thursday, July 25, 2013

Go On A Blind Date With A Book!

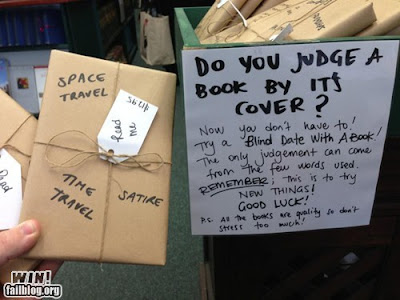
I love reading; almost as much as I love writing. There has been countless occasions where I completely disregarded a book sitting on a shelf because of it's cover art, which is totally judgmental of me. Now that I've started a blog, I realized how upset I would be if someone disregarded my blog post based off of the title. The picture on the outside of the book shouldn't matter as much as the material written inside of the book. The picture we paint for ourselves inside our head while reading the book is more prominent in our minds than any cover page ever could be. A book is suppose to make you feel something, anything, and these feelings can differ from person to person; which is why I think it's ridiculous to judge a book by it's cover. One person could fall in love with a piece of art, while another hates it; the same goes for cover art. It's nearly impossible to choose artwork that satisfies everyone, so why not just pick a book based solely on the content? 


I've heard of one person blind dating another person but I've never heard of a person going on a blind date with a book! It's something that a few book stores and libraries have been picking up on recently. It's simple! The idea is to make sure the person buying the book CAN'T see the cover. You can use any kind of paper (brown paper is used here) and decorate it in any type of way that interests you (they added a simple bow as seen above)! You could find these simple, inexpensive, items at your local CVS or Dollar Store! Once the book is all wrapped up, remember that you have to put the price on it as well as a few descriptive words for the book; so try not to over decorate! The few words will grab the readers attention and have them interested in the content of the book as opposed to the cover. It will also arouse their curiosity regarding the "blind date" process. If you're thinking about hosting your own "Blind Date With A Book" it would be a great idea to test it out at a yard sale! Books are usually huge hits at yard sales! 

Sunday, July 21, 2013

Welcome!


Welcome to my brand new blog and thank you for reading my very first blog post! I'm still getting used to this, so try and bear with me while I learn the ways of the blogging world! If you would like to know some background on me you can click on the "About Me" tab! I also have a tab that will lead you to my online thrift store, so click away and explore! I look forward to discussing my day-to-day thoughts, savings and experiences with everyone!

Don't forget to subscribe and follow me on twitter and instagram! @BriMazzuca